How to Add Appointment Booking to WordPress
How to add appointment booking to WordPress on the site you already have: a booking page, menu and service page links, and the caching and email checks.

Most businesses that want to add appointment booking to WordPress already have a site that works. There’s a home page, a page for each service, a menu, and a “Contact us” button that sends every enquiry to an inbox where someone answers “does Thursday at 3 work?” by hand.
Installing a booking plugin takes ten minutes. What decides whether anyone books is everything around it: whether the menu, the service pages and that contact button lead to the form, and whether two things most established sites already run, page caching and the host’s mail, quietly stop it working. A booking page nobody can find takes about as many bookings as no booking page.
This guide fits appointment booking into the site you already have, in six steps, with a test at the end. We build Schedopia, a free, self-hosted WordPress booking plugin, so the examples use it, but most of the steps apply whichever plugin you choose. If you haven’t picked one yet, the complete guide to WordPress appointment booking covers what to look for.
What you need to add appointment booking to WordPress
- A booking plugin installed, with at least one service, one staff member and their working hours. For Schedopia, Take your first booking in ten minutes gets you there. Schedopia needs WordPress 6.5 and PHP 8.1 or newer.
- Admin access to your site, and to the page builder and caching plugin it uses.
- A phone, for the test at the end.
- About an hour.
Step 1: Give booking a page of its own
A dedicated booking page is the anchor for appointment booking on WordPress: every button and link you add later points to it. Create a page called “Book an appointment” with a short address such as /book, which is easy to say on the phone and print on a card.
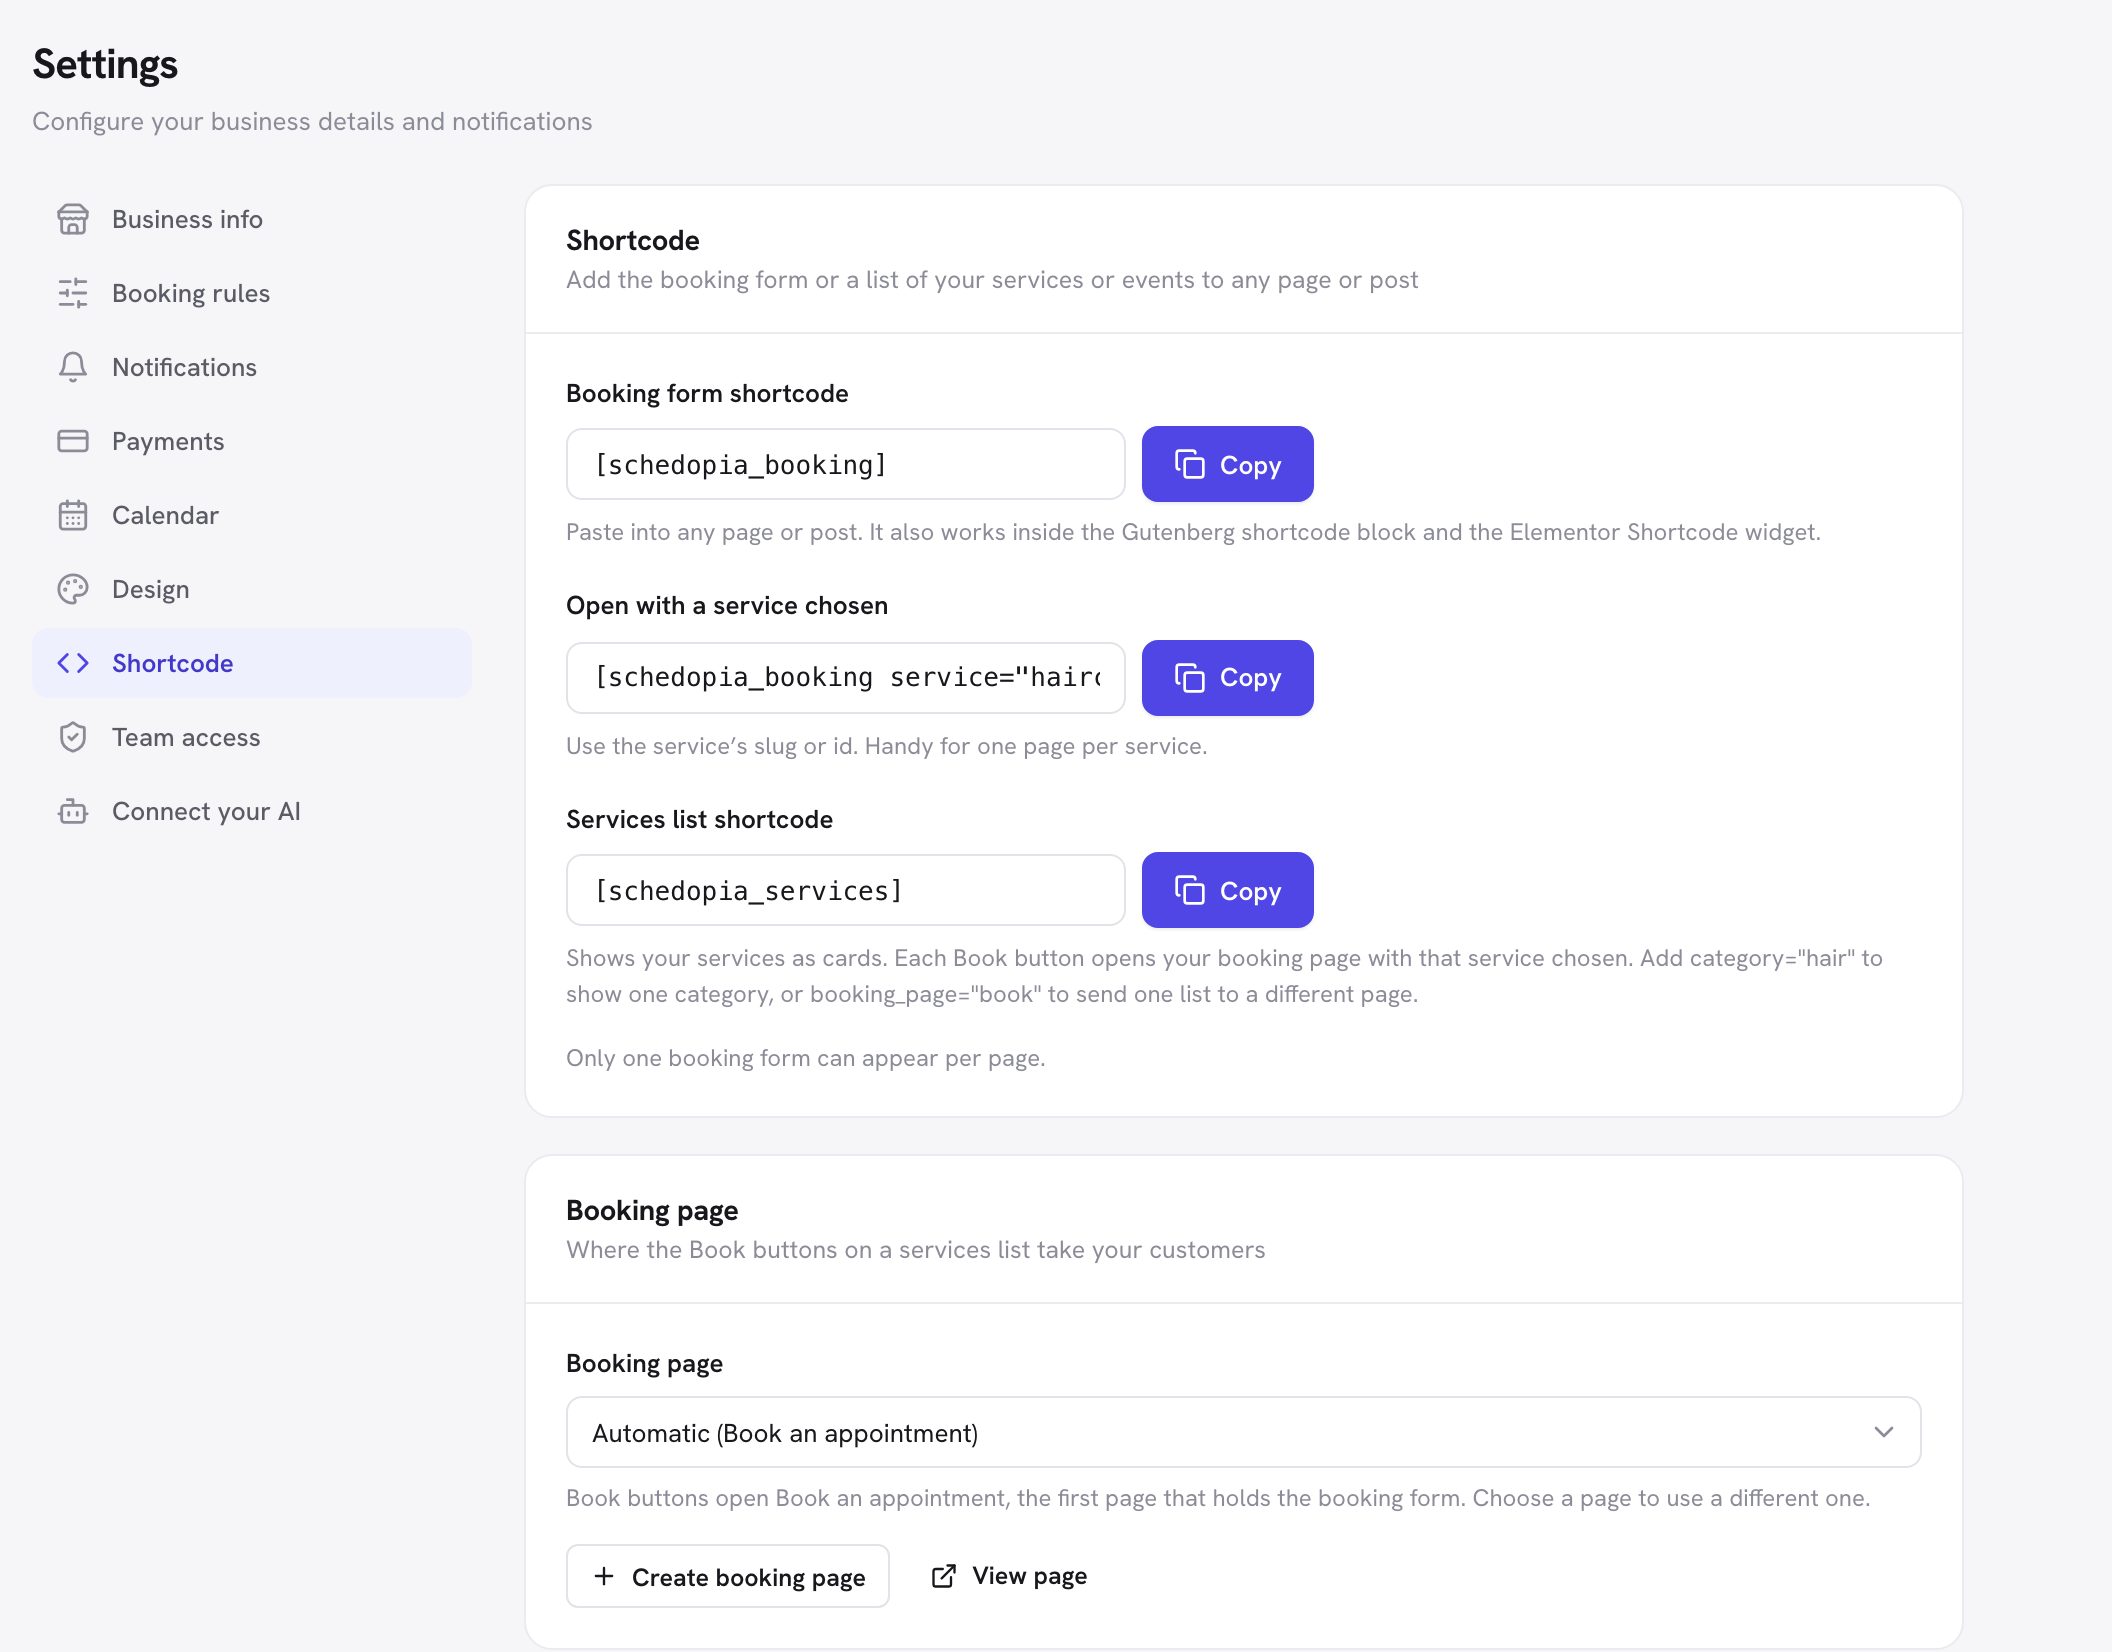
Add the booking form with Schedopia’s shortcode, [schedopia_booking]:
| Your editor | Where the shortcode goes |
|---|---|
| Block editor | A Shortcode block |
| Elementor | The Shortcode widget |
| Classic editor | Straight into the content |
| Other page builders | Any element that renders shortcodes |
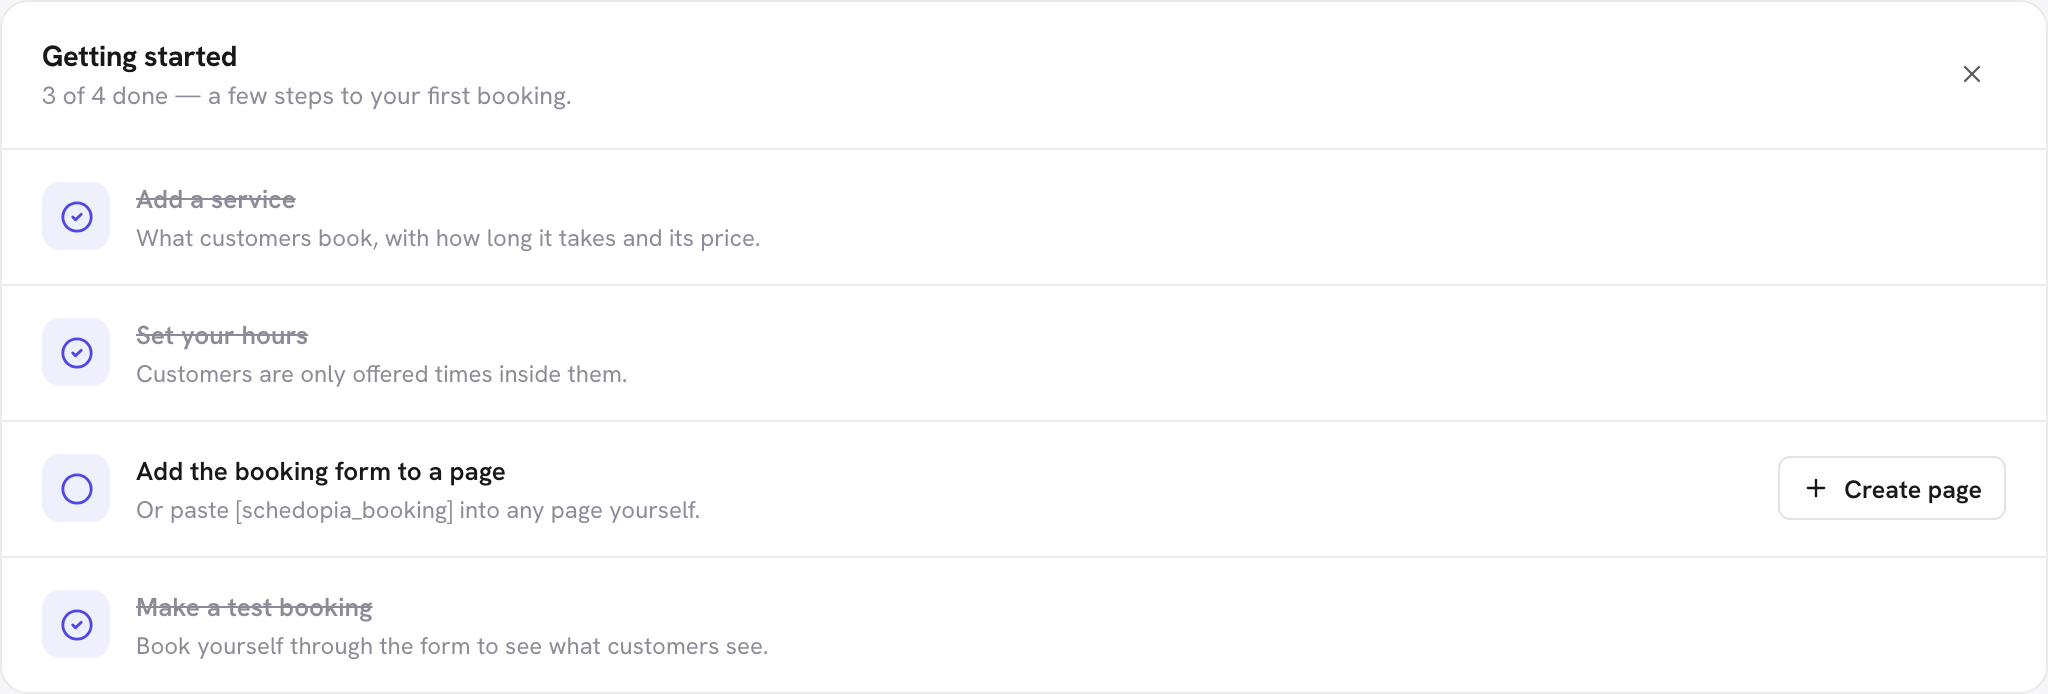
If you’d rather not build the page by hand, the Getting started checklist on Schedopia’s dashboard has a Create page button. It publishes a “Book an appointment” page with the form already on it, and you can then change its address to /book.
Above the form, write two or three lines that answer what people would otherwise phone about: how long appointments take, how payment works and how to cancel. Below it, point to your contact page for anything that isn’t a booking.
Schedopia’s form sizes itself to the column it sits in rather than the browser window, so it fits your theme’s normal content width as well as a full-width page. Only one booking form can appear on a page; a second copy of the shortcode shows visitors nothing.
Step 2: Put a Book button where people already look
Visitors look for booking in the header, so the booking page goes in your main menu first. Add it under Appearance → Menus, or with the Navigation block in the Site Editor on a block theme. If your theme has a header button, point it at /book and label it “Book now”.
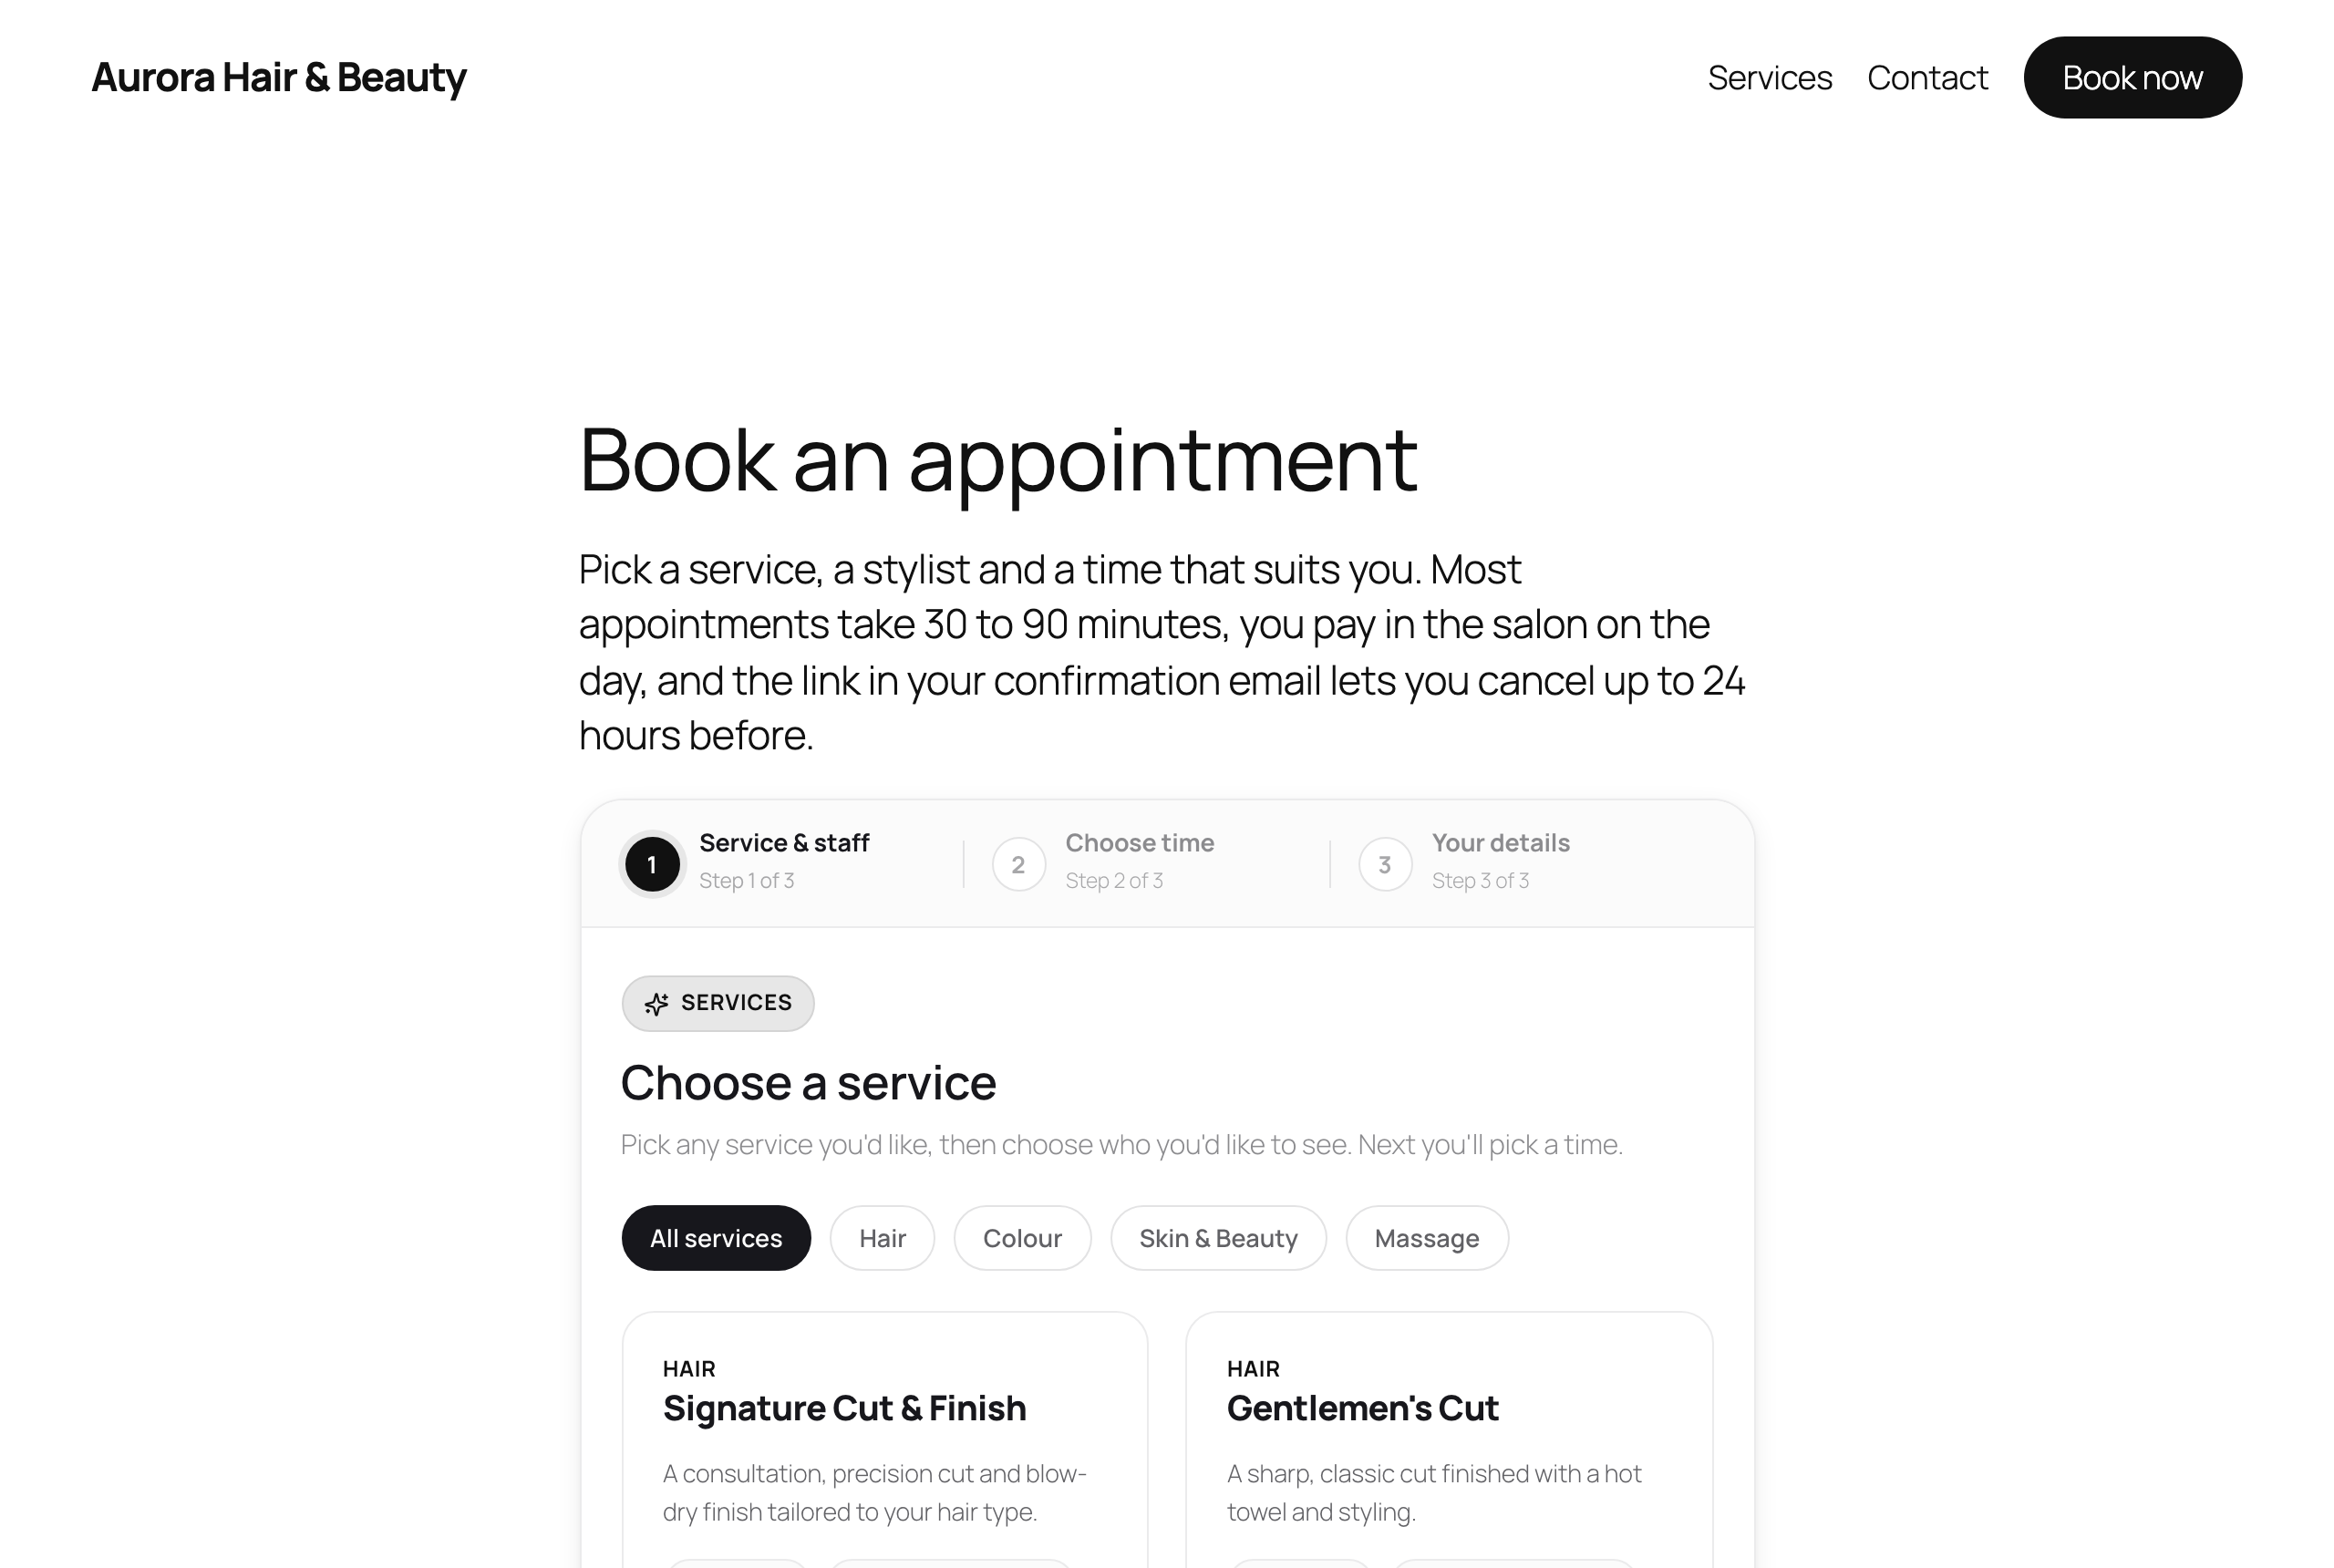
Then go through the pages that already get traffic and change where they send people:
- The home page. If most enquiries are really booking requests, swap the main “Contact us” button for “Book an appointment”.
- The contact page. Keep the form for questions, and add a line above it: “Want an appointment? Book online and pick your own time.”
- The footer. A plain “Book” link catches people who scroll to the bottom looking for one.
- Everywhere you print your phone number. Email signatures, social profiles and business cards can carry the booking address too.
Keep the contact form, though. Some people want to ask before they commit, and a booking form is the wrong place for “do you do curly hair?”
Step 3: Let each service page book its own service
A service page is where a visitor decides, so it should let them book that service without starting again. In Schedopia, add [schedopia_booking service="gentlemens-cut"] to the Gentlemen’s Cut page, using the service’s slug or id, and the form opens with that service already ticked and the staff who offer it listed underneath. The visitor’s next choice is who to see and when.
If you’d rather keep service pages for reading, add a “Book this service” button that links to /book instead. For one page that lists everything you offer, [schedopia_services] shows your services as cards, and each card’s Book button opens your booking page with that service selected.
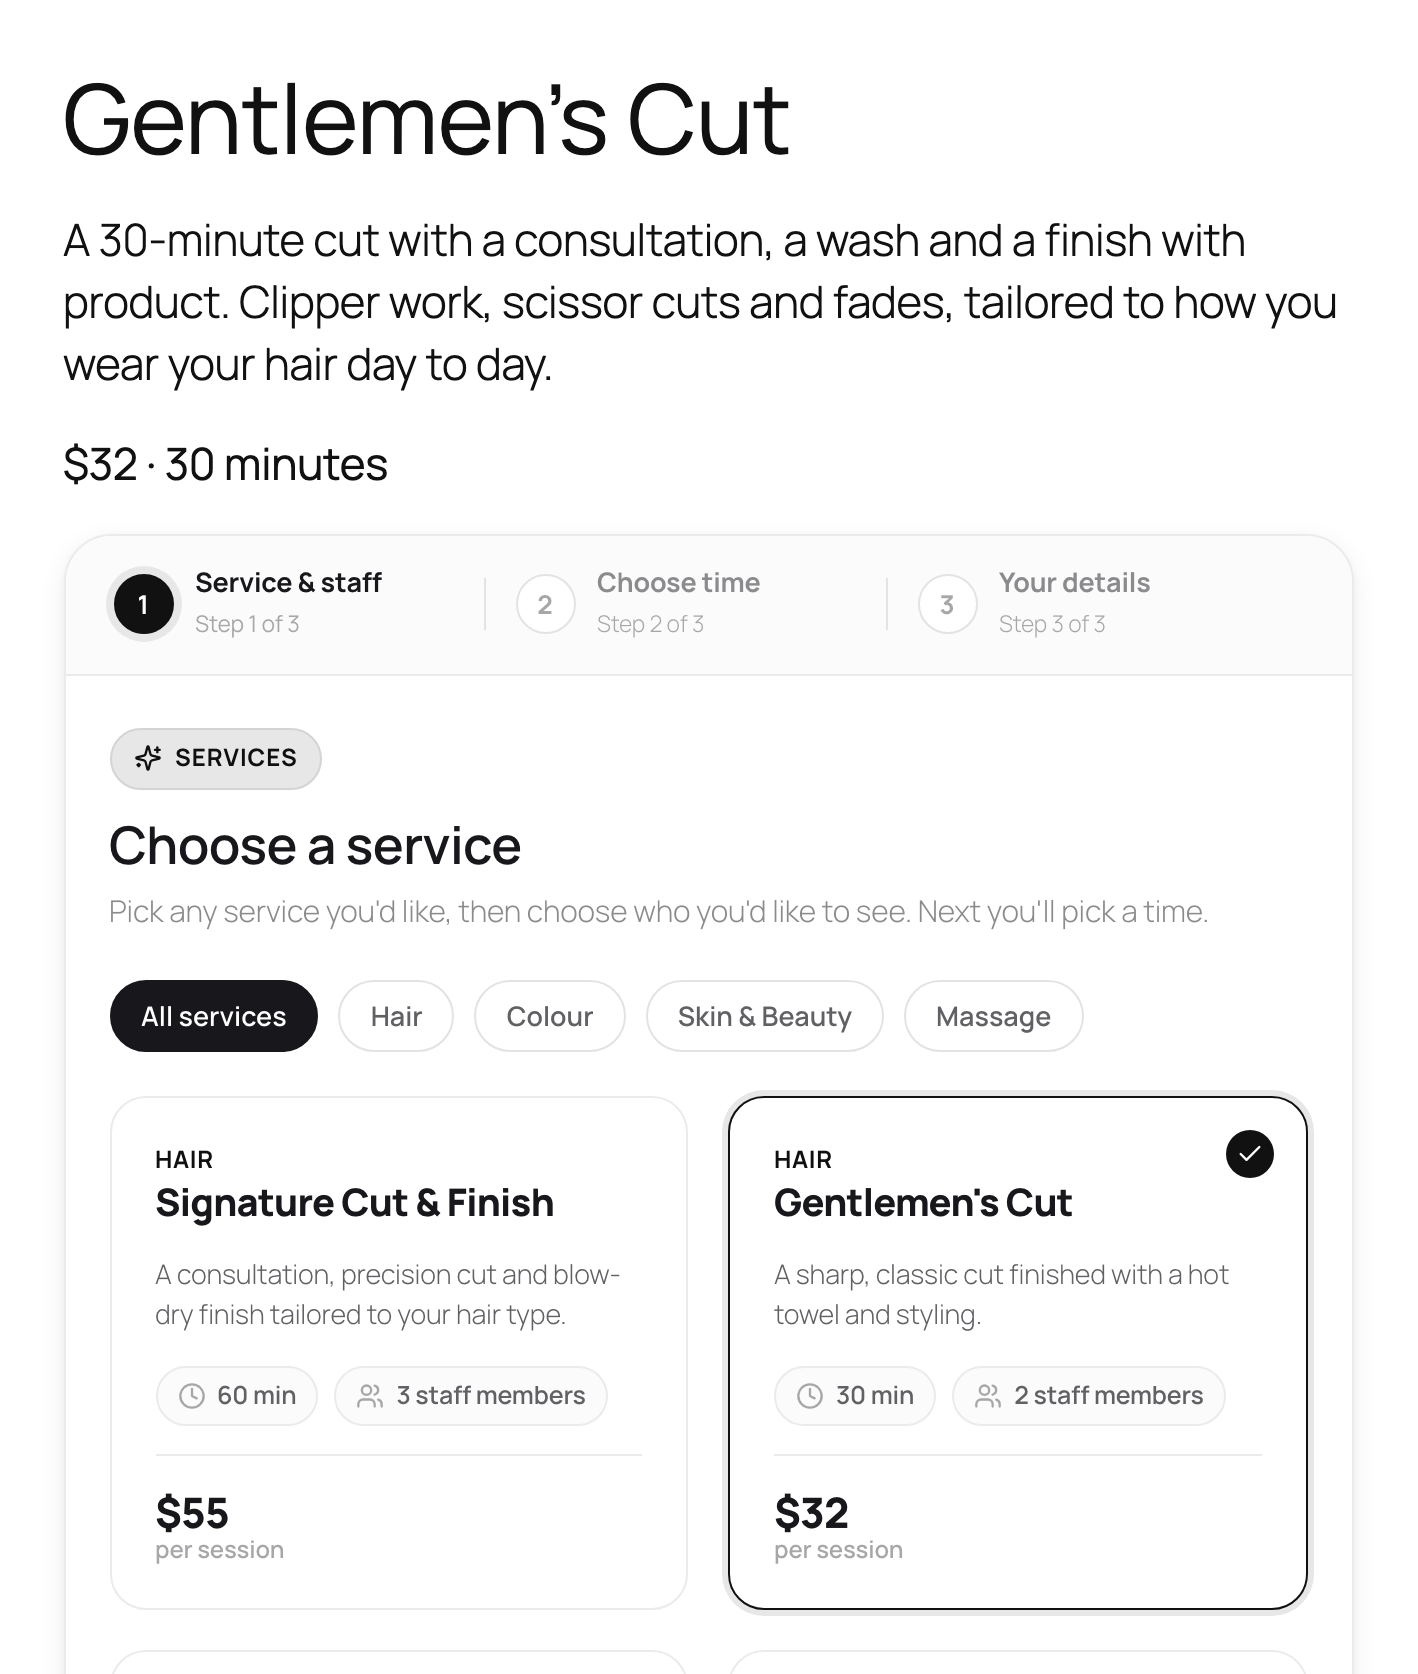
Step 4: Make the form look like the rest of the site
A booking form that looks bolted on makes people hesitate before typing in their details. In Schedopia, open Schedopia → Design, choose Booking form and set the Primary color to your brand colour. For the heading and body fonts, pick Use my theme’s font to match your site’s typography. The live preview switches between desktop and mobile.
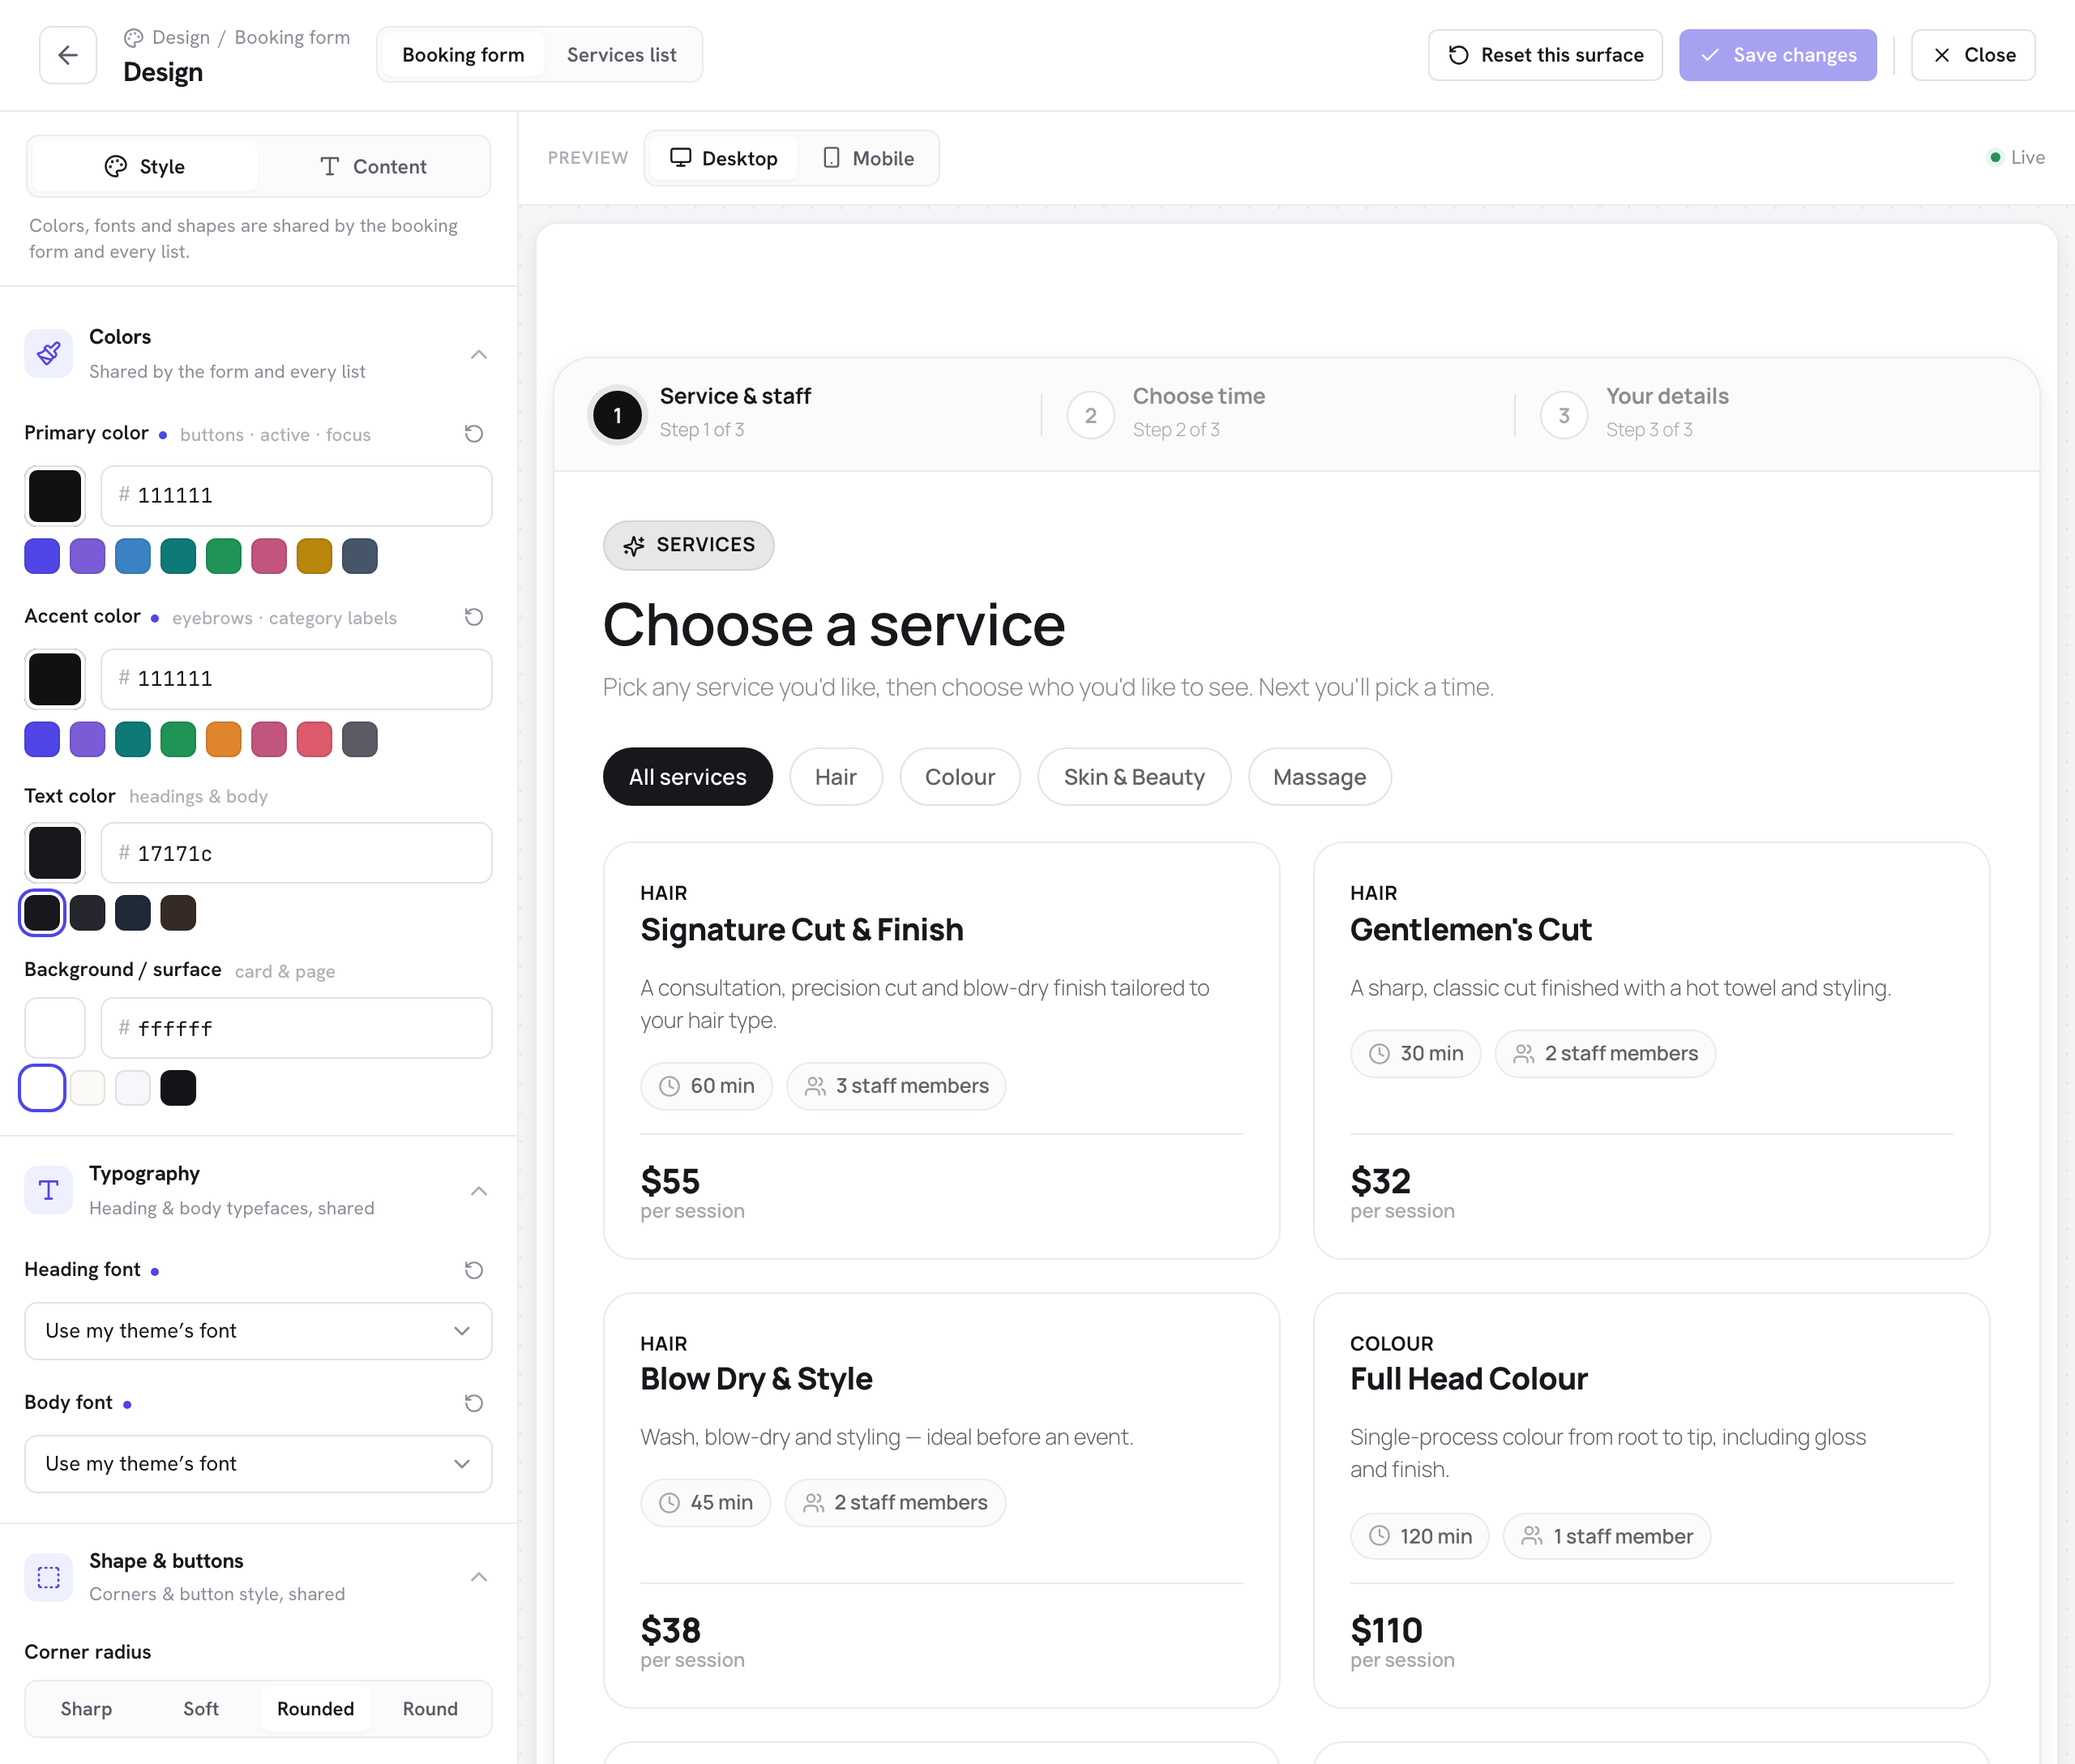
Schedopia scopes its styles to the form and writes them to take precedence over a theme’s or page builder’s own heading and button styles, so a theme that makes every button orange doesn’t restyle the form. If your theme has unusual CSS, check the form on the live page as well as in the preview.
Step 5: Check the settings that quietly break booking
Three settings on an established site can stop bookings without any error reaching you. Check each one before you tell customers about the page.
Keep the booking page out of the page cache
Page caching serves a saved copy of a page instead of building it fresh, which suits a blog post and not a booking page. Schedopia’s booking form loads live availability and carries a WordPress security token that expires after 12 to 24 hours. A cached copy older than that can fail to load available times.
Caching plugins and hosts with built-in caching usually have a list of pages never to cache. Add your booking page’s address, such as /book/, and any service pages that carry the form from Step 3. A page with only the services list can stay cached, though a cached copy shows old prices until the cache clears.
Make sure booking emails arrive
Schedopia sends its emails through WordPress’s standard mail function, and many hosts deliver that mail poorly, so confirmations land in spam or never arrive. Install a reputable SMTP plugin connected to a real mail service, and Schedopia uses it automatically. Under Schedopia → Settings → Notifications, set the sender email to an address on your own domain, since mail from a domain you don’t control is more likely to be filtered.
Reminders go out a set number of hours before each appointment, 24 by default, and rely on WordPress’s scheduled tasks, which run when the site gets visits. On a quiet site they can go out late. If timing matters, ask your host to set up a real server cron job.
Set WordPress to your city’s timezone
Since version 1.4.2, Schedopia takes every booking time from the timezone in WordPress under Settings → General. A site set up years ago may still be on UTC+0, the WordPress default, or on a manual offset such as UTC+1, which doesn’t move for daylight saving. Pick your city instead. The Schedopia 1.4.2 release post explains what changed.
Step 6: Book an appointment the way a customer would
The only proof that booking works is a booking. Use your phone and a private browser window, so you see the site as a visitor does:
- Open your home page and tap the Book link in the menu.
- Choose a service, a staff member and a time more than a day ahead, then enter your name and an email address you can check.
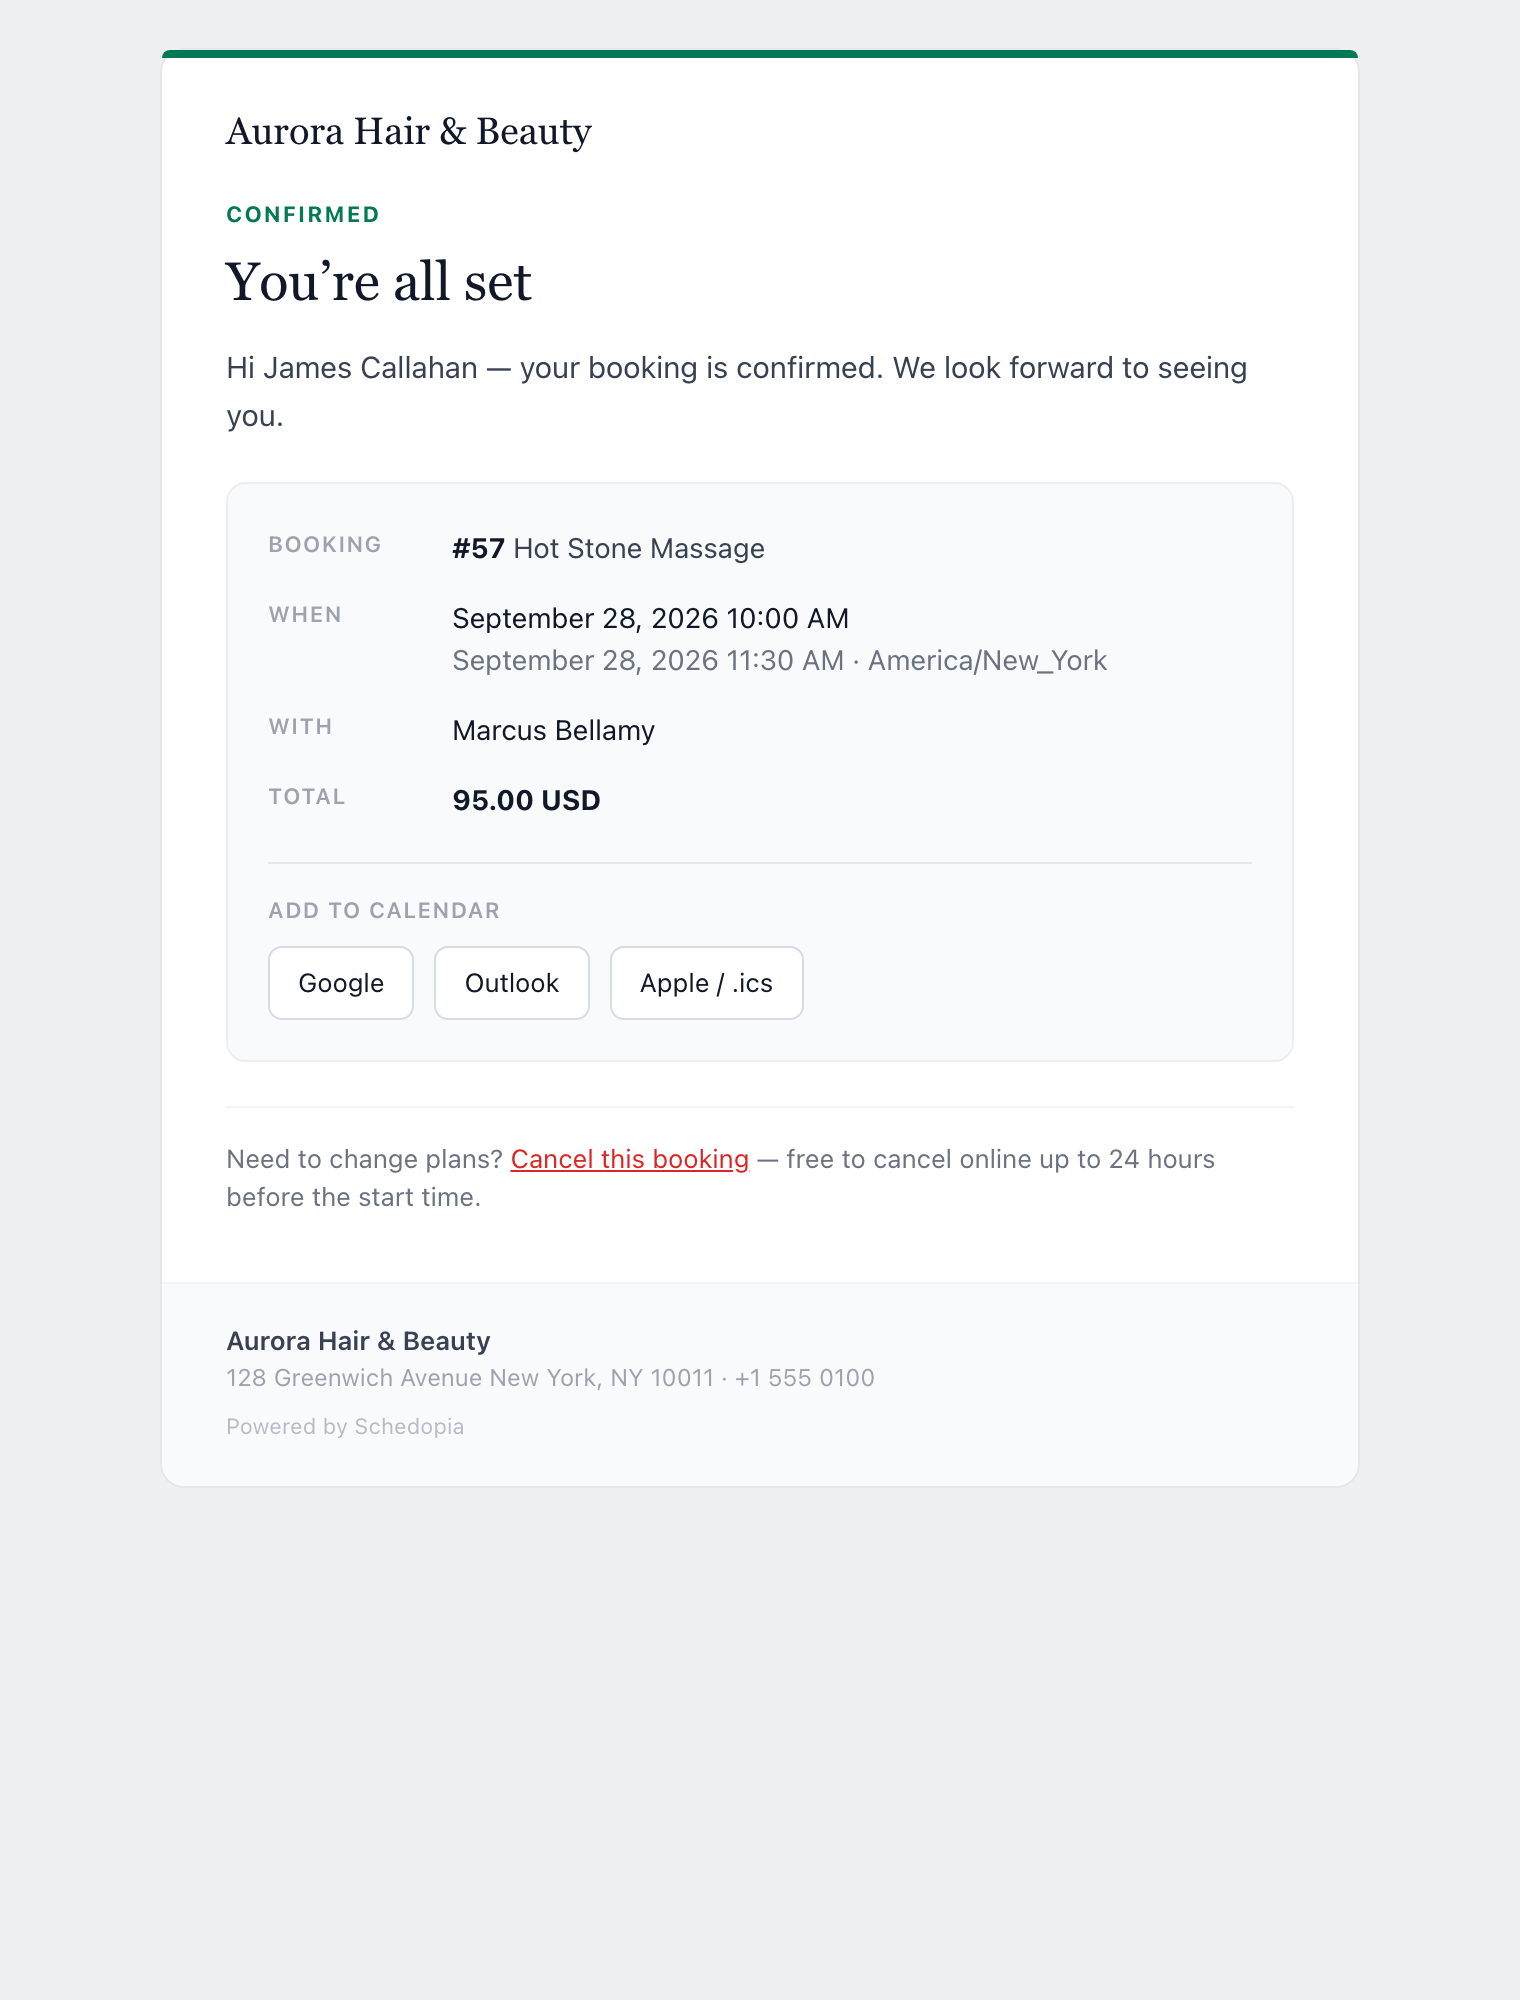
- Confirm, and check that the confirmation email reaches your inbox within a few minutes.
- Open a service page and check that the form opens with that service chosen.
- In WordPress, find the booking under Schedopia → Bookings.
- Cancel it from the link in the email, so the slot opens again.
The appointment needs to be more than a day away because the cancel link stops working 24 hours before the start, by default. Schedopia’s Getting started checklist on the dashboard ticks off Add the booking form to a page and Make a test booking as you go, which is a quick way to see nothing was missed.
What Schedopia won’t do yet
Schedopia handles the booking itself, but a few things customers might expect aren’t there yet, as of version 1.4.2:
- No online card payment. Customers pay on the day or by bank transfer, and you record the payment against the booking. If you need a deposit at the moment of booking to cut no-shows, Schedopia can’t take one yet. Online payments are planned for Schedopia Pro, which isn’t on sale.
- No customer accounts. Customers book with a name and contact details and cancel from the link in their email. There is no login where they can see past appointments.
- No SMS. Confirmations and reminders go by email only.
- Cancelling, not rescheduling. Customers can cancel themselves; moving an appointment to another time is done by you, from the admin.
- No native block or Elementor widget. The form goes in through the editor’s own Shortcode block or widget, as in Step 1.
Where to start
Do the two steps that make the biggest difference today: create the /book page with the form on it, and put a Book link in your header menu. Then book one appointment from your phone. The service pages, the styling and the email setup can follow during the week, but a booking page people can find starts taking bookings the day it goes up.
Frequently Asked Questions
How do I add appointment booking to an existing WordPress site?
Install a booking plugin, put its form on a page of its own, then link that page from your menu, home page and service pages. With Schedopia, the form is the [schedopia_booking] shortcode, added in a Shortcode block, the Elementor Shortcode widget or the classic editor.
Will a booking plugin work with my theme and page builder?
Usually, yes. Schedopia's booking form goes in with a shortcode, so it works in the block editor, Elementor, the classic editor and any builder that renders shortcodes, and it sizes itself to the column it sits in.
Should I exclude my booking page from caching?
Yes. Schedopia's booking form loads live availability and carries a WordPress security token that expires after 12 to 24 hours, so a cached copy can fail to load times. Exclude the booking page and leave the rest of the site cached.
Can I put a booking form on each service page?
Yes. In Schedopia, [schedopia_booking service="gentlemens-cut"] opens the form with that service already chosen, using the service's slug or id. Only one booking form can appear on a page.
Why aren't booking confirmation emails arriving?
Usually because the host delivers WordPress mail poorly. Install an SMTP plugin connected to a real mail service and send from an address on your own domain. Schedopia uses the standard WordPress mail function, so it picks up the SMTP plugin automatically.
Do customers need an account to book an appointment?
No. Schedopia asks for a name and contact details, with no password, and customers cancel from the link in their confirmation email.
Can customers pay online when they book?
Not with Schedopia yet. Schedopia records offline payments, such as cash or bank transfer, against each booking. Online card payments are planned for Schedopia Pro, which is not on sale yet.