How to Create an Online Booking System in WordPress
Build a WordPress booking system from the back: services, staff hours, booking rules, emails and payments first, then the booking form, then a real test.

Most people who set out to create a WordPress booking system start where their customers will: install a plugin, put the booking form on a page, publish. The form appears, the times look plausible, and the first booking lands at 5:30 PM on a day you close at 5.
That isn’t the plugin’s fault. A booking form only offers what the rules behind it allow, and on day one those rules are defaults: someone else’s opening hours, no gap between clients, no days off. The form is the last layer of the system, and it shows every mistake made in the layers underneath.
So build it from the back. Decide what can be booked, who does it and when, and what happens after someone books, and only then put the form on a page. This guide walks through that order with Schedopia, the free, self-hosted WordPress booking plugin we build, using a two-stylist salon as the example. The order holds whichever plugin you choose. For the wider picture, start with the complete guide to WordPress appointment booking; for fitting the finished form into a site you already have, see How to add appointment booking to WordPress.
What a WordPress booking system is made of
A WordPress booking system has four layers, and customers only ever see the last one.
| Layer | What it decides | Where it lives in Schedopia |
|---|---|---|
| The catalogue | What can be booked, how long it takes, what it costs | Services, Categories, Add-ons |
| Availability | Who performs each service, when, and with how much room around it | Staff, Scheduling |
| The workflow | What happens after someone books: approval, emails, cancellations, payments | Settings |
| The front | The form and the pages it sits on | The [schedopia_booking] shortcode |
A mistake in a lower layer surfaces in the form. A duration that’s too short offers a slot that runs into the next client. A missing day off takes bookings during your holiday. Building from the top down means finding these one complaint at a time.
Can you build a booking system in WordPress without a plugin?
Yes, but every route without a booking plugin leaves one job to a person: checking that a time is free before saying yes.
| Route | What it does well | What it leaves to you |
|---|---|---|
| Contact form and a shared calendar | Free, and already on most sites | Reading each request, checking the calendar, replying |
| A hosted scheduler embedded in a page | Live availability with nothing to install | Usually a subscription, and your bookings stored on the provider’s servers |
| Custom code | Exactly your rules | Building availability, double-booking checks and emails, then maintaining them |
| A booking plugin | Live availability, with bookings stored in WordPress | Keeping WordPress and the plugin updated |
The custom route looks cheap until you price the hard part. Two customers open the form, both see the last 10:00 AM slot and both press Book. A form that checked availability when the page loaded accepts both. Schedopia re-checks the slot at the moment the booking is saved, inside a database transaction, so the second customer is told the time was just taken. We’ve made the case for keeping bookings on your own site elsewhere, so the rest of this guide assumes a plugin.
Step 1: Write your rules down before you install anything
The rules sheet is the real booking system; the plugin only enforces it. On paper or in a spreadsheet, write down:
- Every service, with the time the customer sees and the time it really takes. A 60-minute cut and finish that needs 10 minutes to sweep up and reset is both numbers.
- Who performs each service.
- Each person’s working hours, breaks and known days off.
- How many customers fit in one slot. One, unless you run classes.
- How much notice you need before an appointment, and how late someone may cancel.
- Whether you approve each booking or let it confirm itself.
- How people pay: on the day, by bank transfer, or not through you at all.
Twenty minutes on this sheet saves an afternoon of moving appointments that should never have been offered.
Step 2: Install Schedopia and set your timezone
Install Schedopia from Plugins → Add New, activate it and choose Appointments when the setup wizard asks for your booking type. Schedopia needs WordPress 6.5 and PHP 8.1 or newer.
Then check Settings → General in WordPress. Since version 1.4.2, Schedopia takes every booking time from the WordPress timezone, so pick your city rather than a UTC offset, which doesn’t move for daylight saving. Do it before the first booking arrives. If you leave the wizard early, Schedopia gives you Monday to Friday, 9 to 6, as working hours; you’ll replace those in Step 4.
Step 3: Build the catalogue
Each line on your rules sheet becomes a service under Schedopia → Services, with a name, a duration and a price. Use names customers would recognise and a sentence of description where two services sound alike.
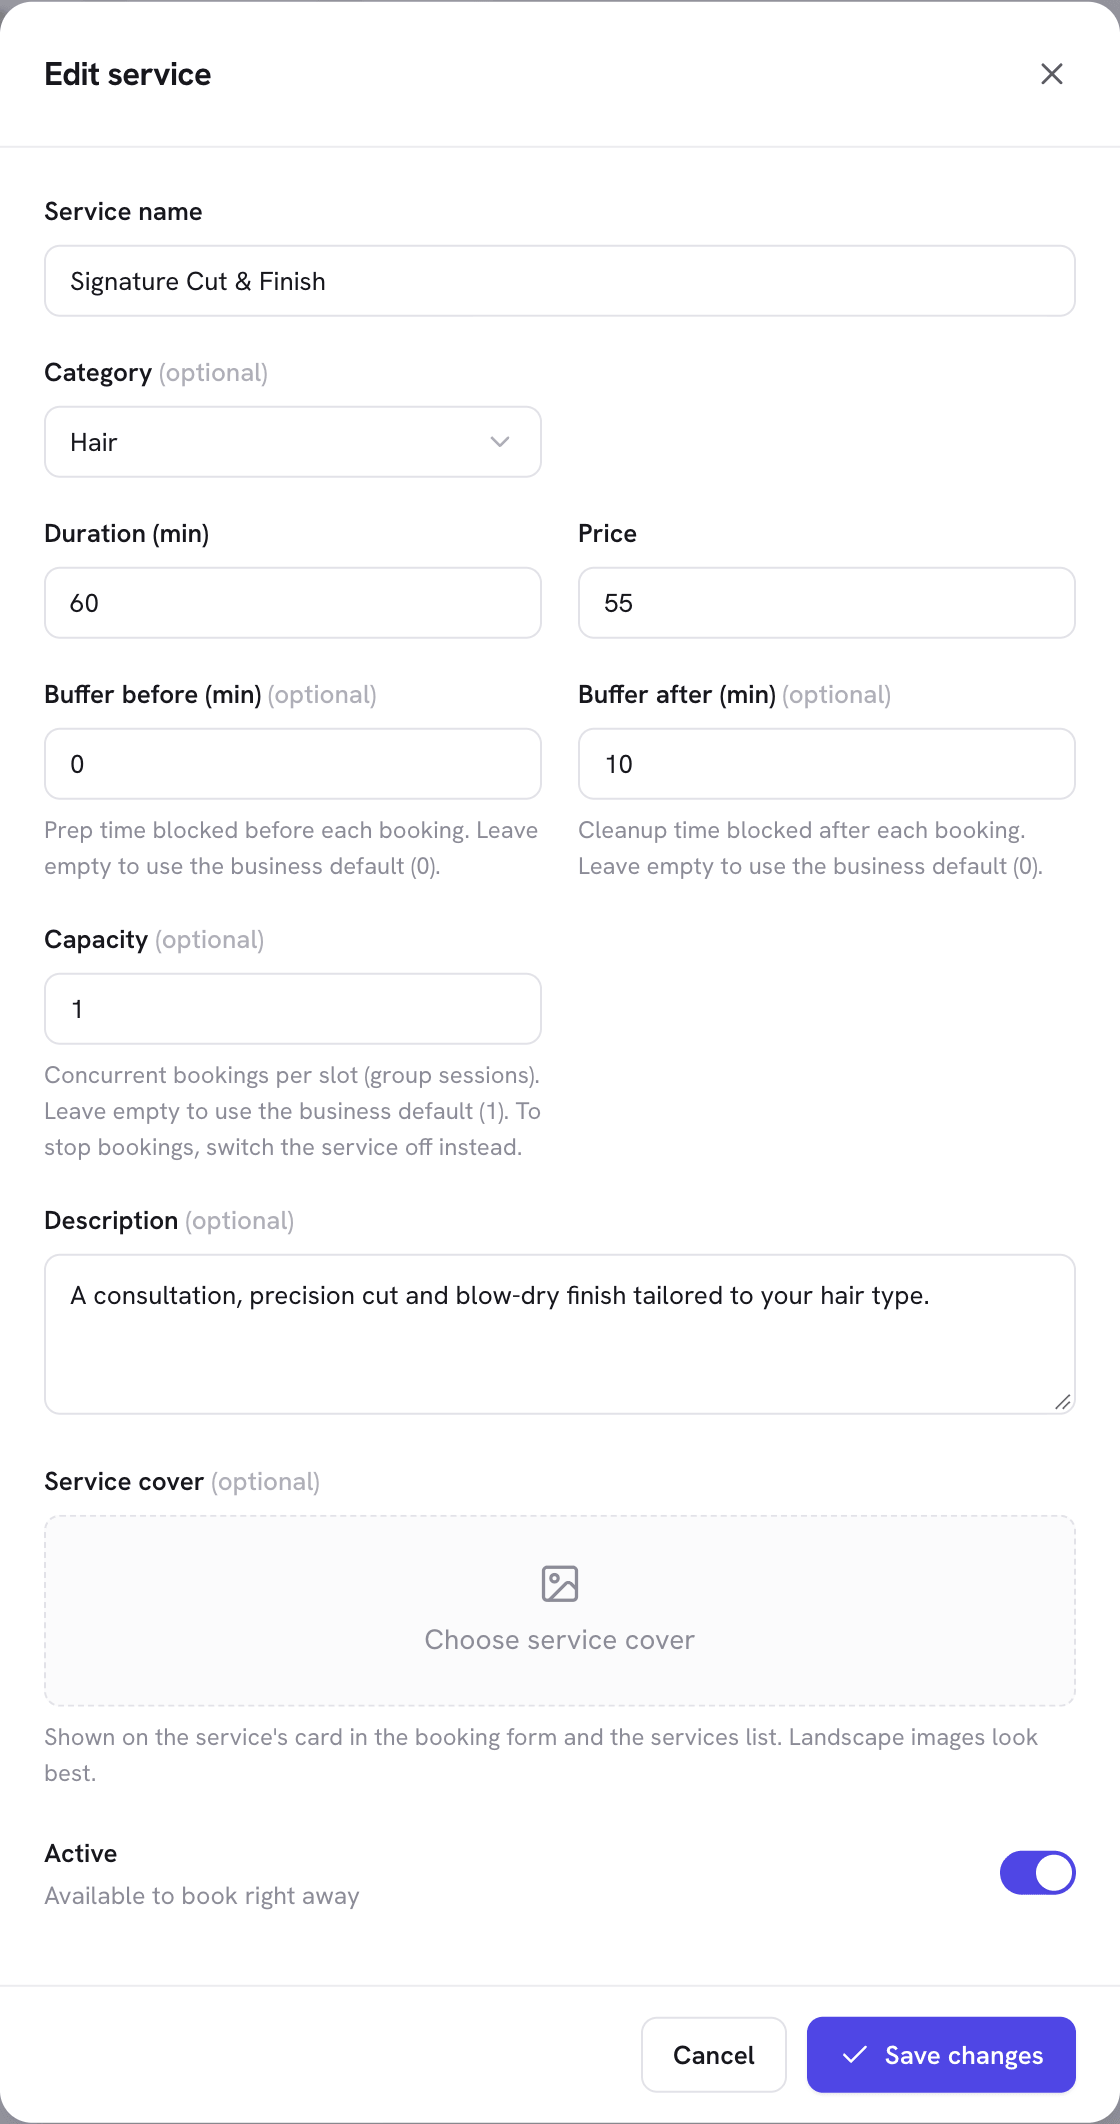
Set the duration to the time the customer is in the chair, and put the clean-up in the buffer fields. Customers see a 60-minute appointment; your calendar blocks 70. Leave the buffer and capacity fields empty to follow the business default you’ll set in Step 5, and fill them only for services that differ.
Two optional pieces make a bigger catalogue easier to use. Categories under Schedopia → Categories give the form filter chips, so a customer looking for colour doesn’t scroll past every cut. Add-ons under Schedopia → Add-ons are extras with their own price and duration: add a 15-minute scalp treatment to a 60-minute cut, and Schedopia only offers times with room for all 75 minutes.
Step 4: Add staff and their working hours
Availability in Schedopia is worked out per staff member, so even a one-person business needs one staff record. Add each person under Schedopia → Staff and tick every service they perform. A service with nobody assigned never appears on the form, which is the first thing to check when one goes missing.
Set hours under Schedopia → Scheduling. The business default hours apply to everyone; switch the selector at the top to a person’s name to give them their own, such as a stylist who works Tuesday to Saturday. A day can have two windows, 10:00 AM to 1:00 PM and 2:00 PM to 6:00 PM, which is how a lunch break stays off the form.
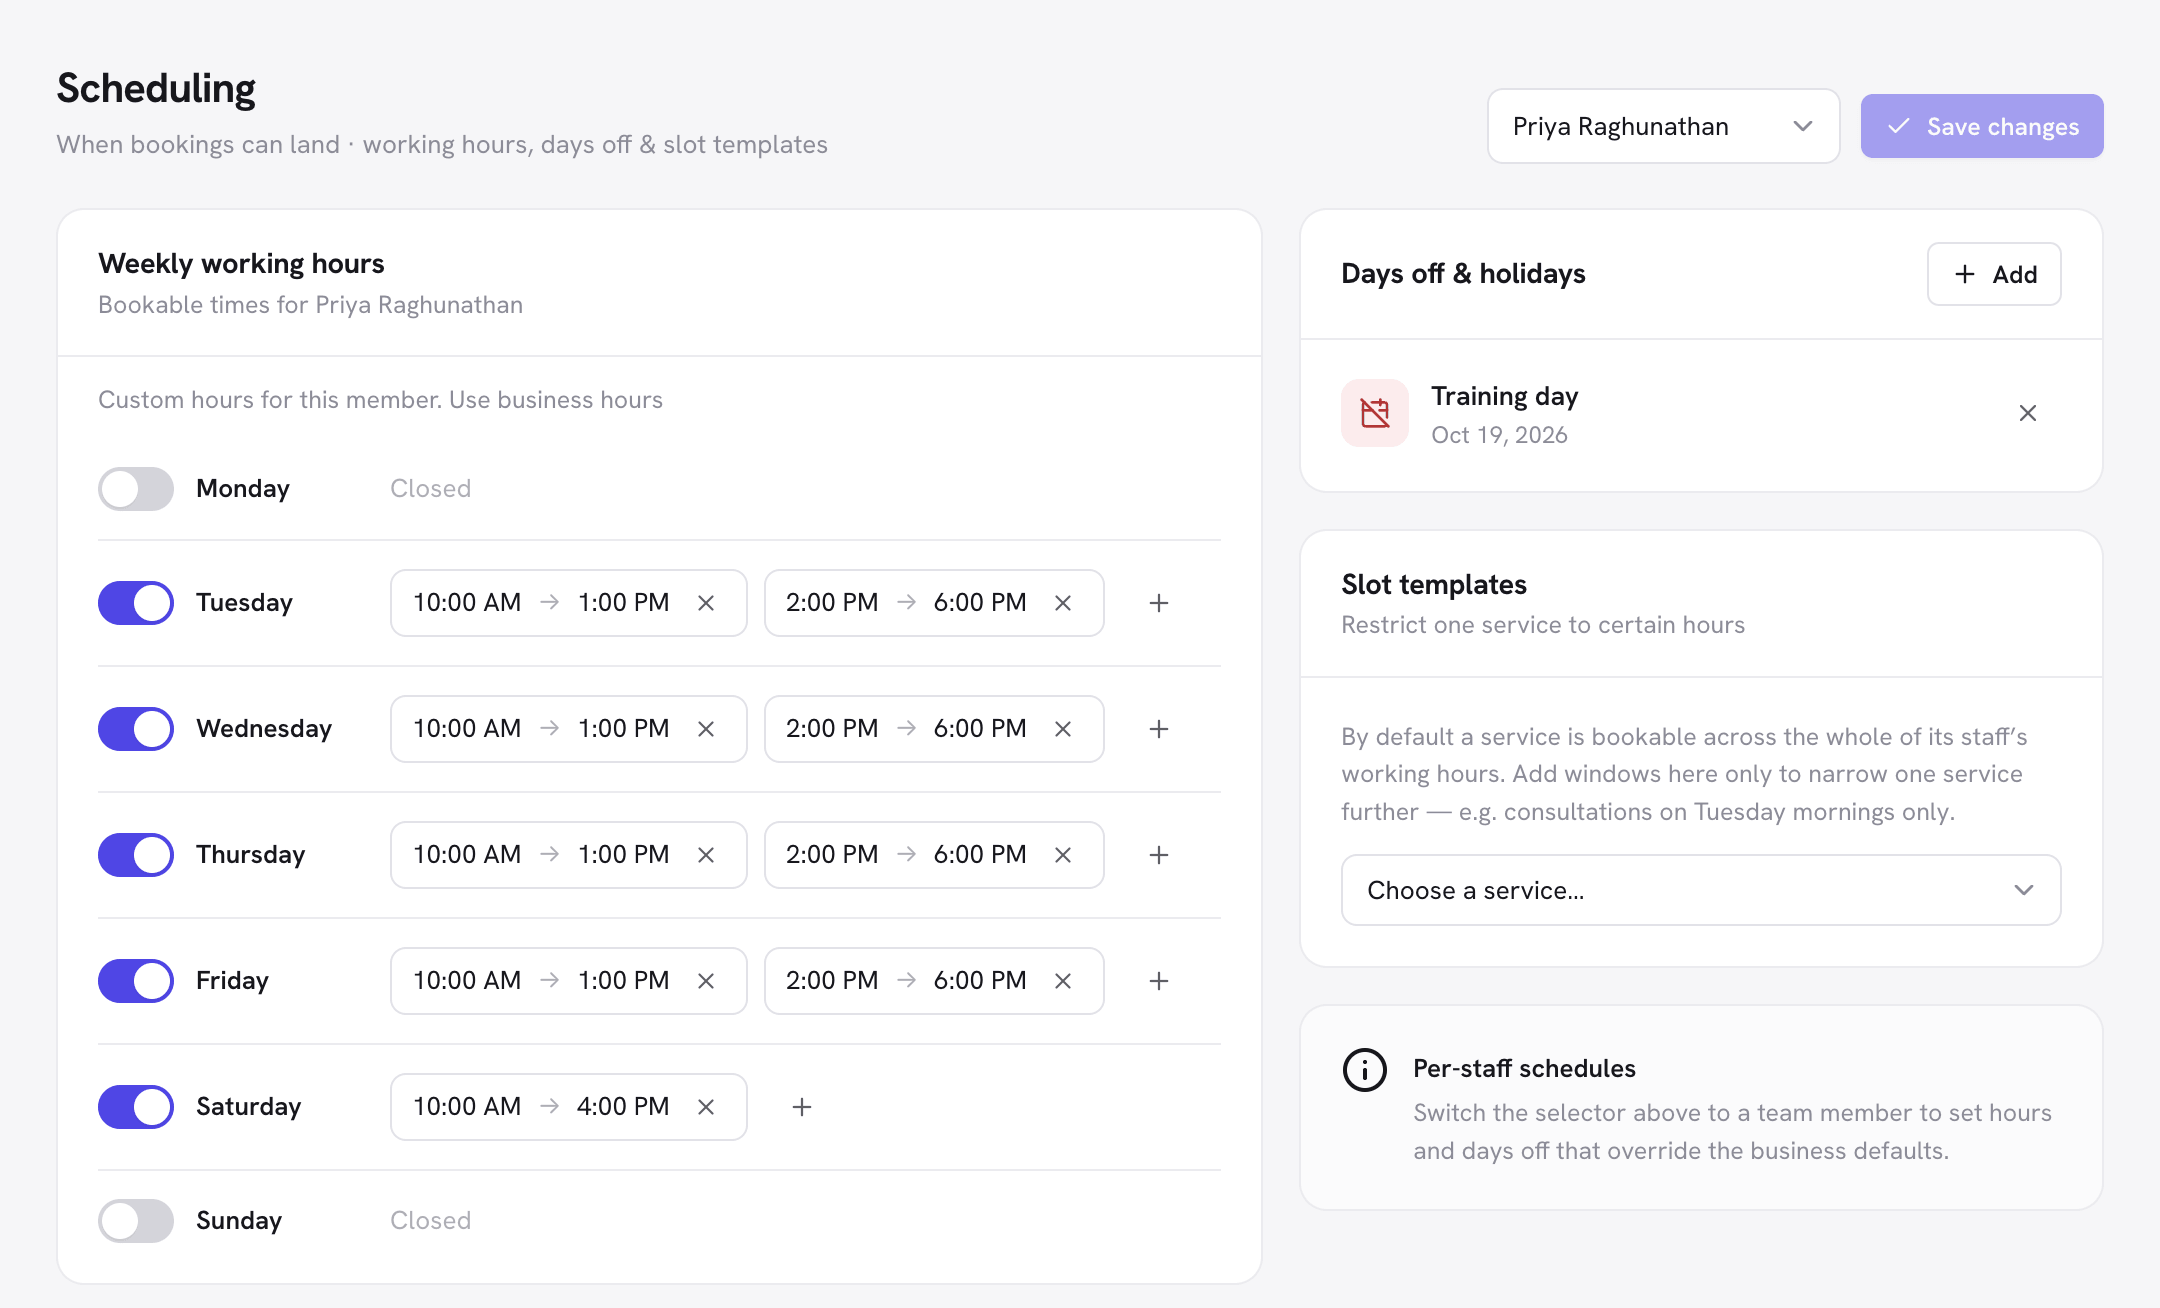
Add known days off in the same screen, against the whole business for a public holiday or against one person for their leave. A day off stops new bookings on that date but doesn’t cancel the ones already there, so check the bookings list when you add one at short notice.
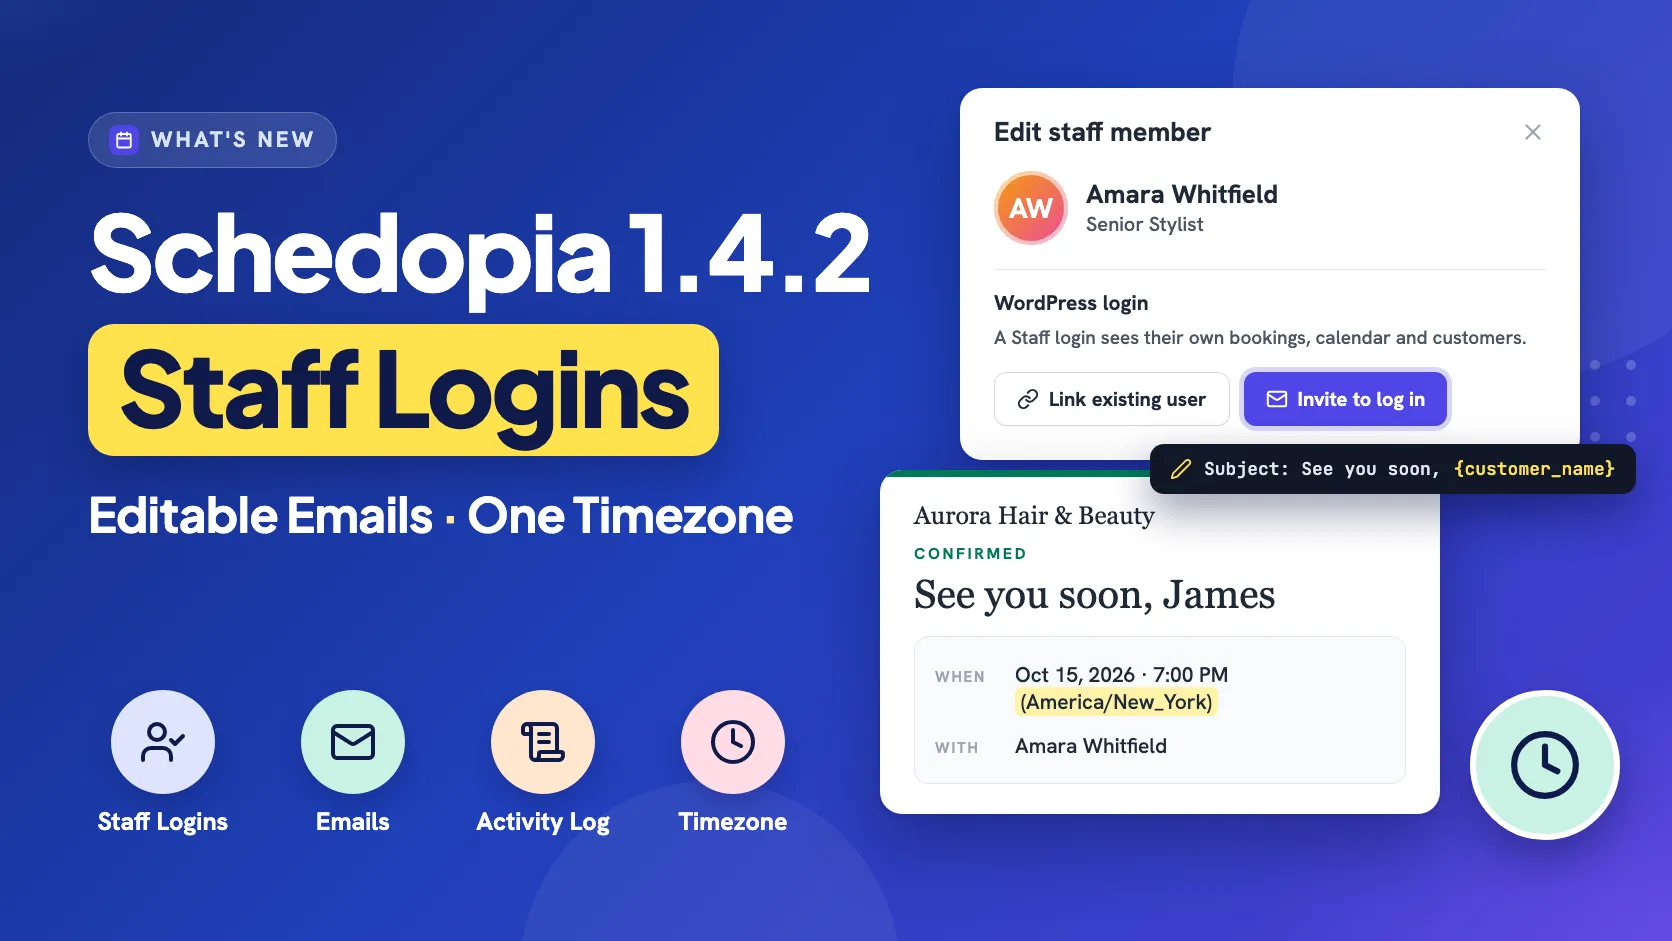
Staff who should see their own diary can have a login since version 1.4.2. Under Staff → Edit, link them to an existing WordPress user or invite them by email. A Staff login sees only that person’s bookings, calendar and customers.
Step 5: Set the rules that shape every slot
Four settings in the Buffers & capacity card on the Scheduling screen decide which start times the form offers: buffers, slot interval, capacity per slot and minimum notice.
- Buffers hold time free before and after each appointment. Buffer after is the useful one for turnaround.
- Slot interval sets how far apart start times are. On Service length, start times run back to back, so a 60-minute cut with a 10-minute buffer after is offered at 9:00, 10:10 and 11:20 AM. Set 15 minutes and it starts on the quarter hour instead, and the overlapping times disappear once one is booked.
- Capacity per slot is how many customers can hold the same time. Keep it at 1 for one-to-one work and raise it on the service itself for a class.
- Minimum notice stops last-minute bookings. Two hours means nobody books 10:00 AM at 9:58. Bookings you make yourself in the admin ignore it, so a walk-in is still your call.
Slot interval and minimum notice apply to the whole business. Buffers and capacity can be overridden per service, as in Step 3.
Step 6: Decide what happens after someone books
The workflow layer covers everything between a customer pressing Book and the appointment taking place, and most of it lives under Schedopia → Settings.
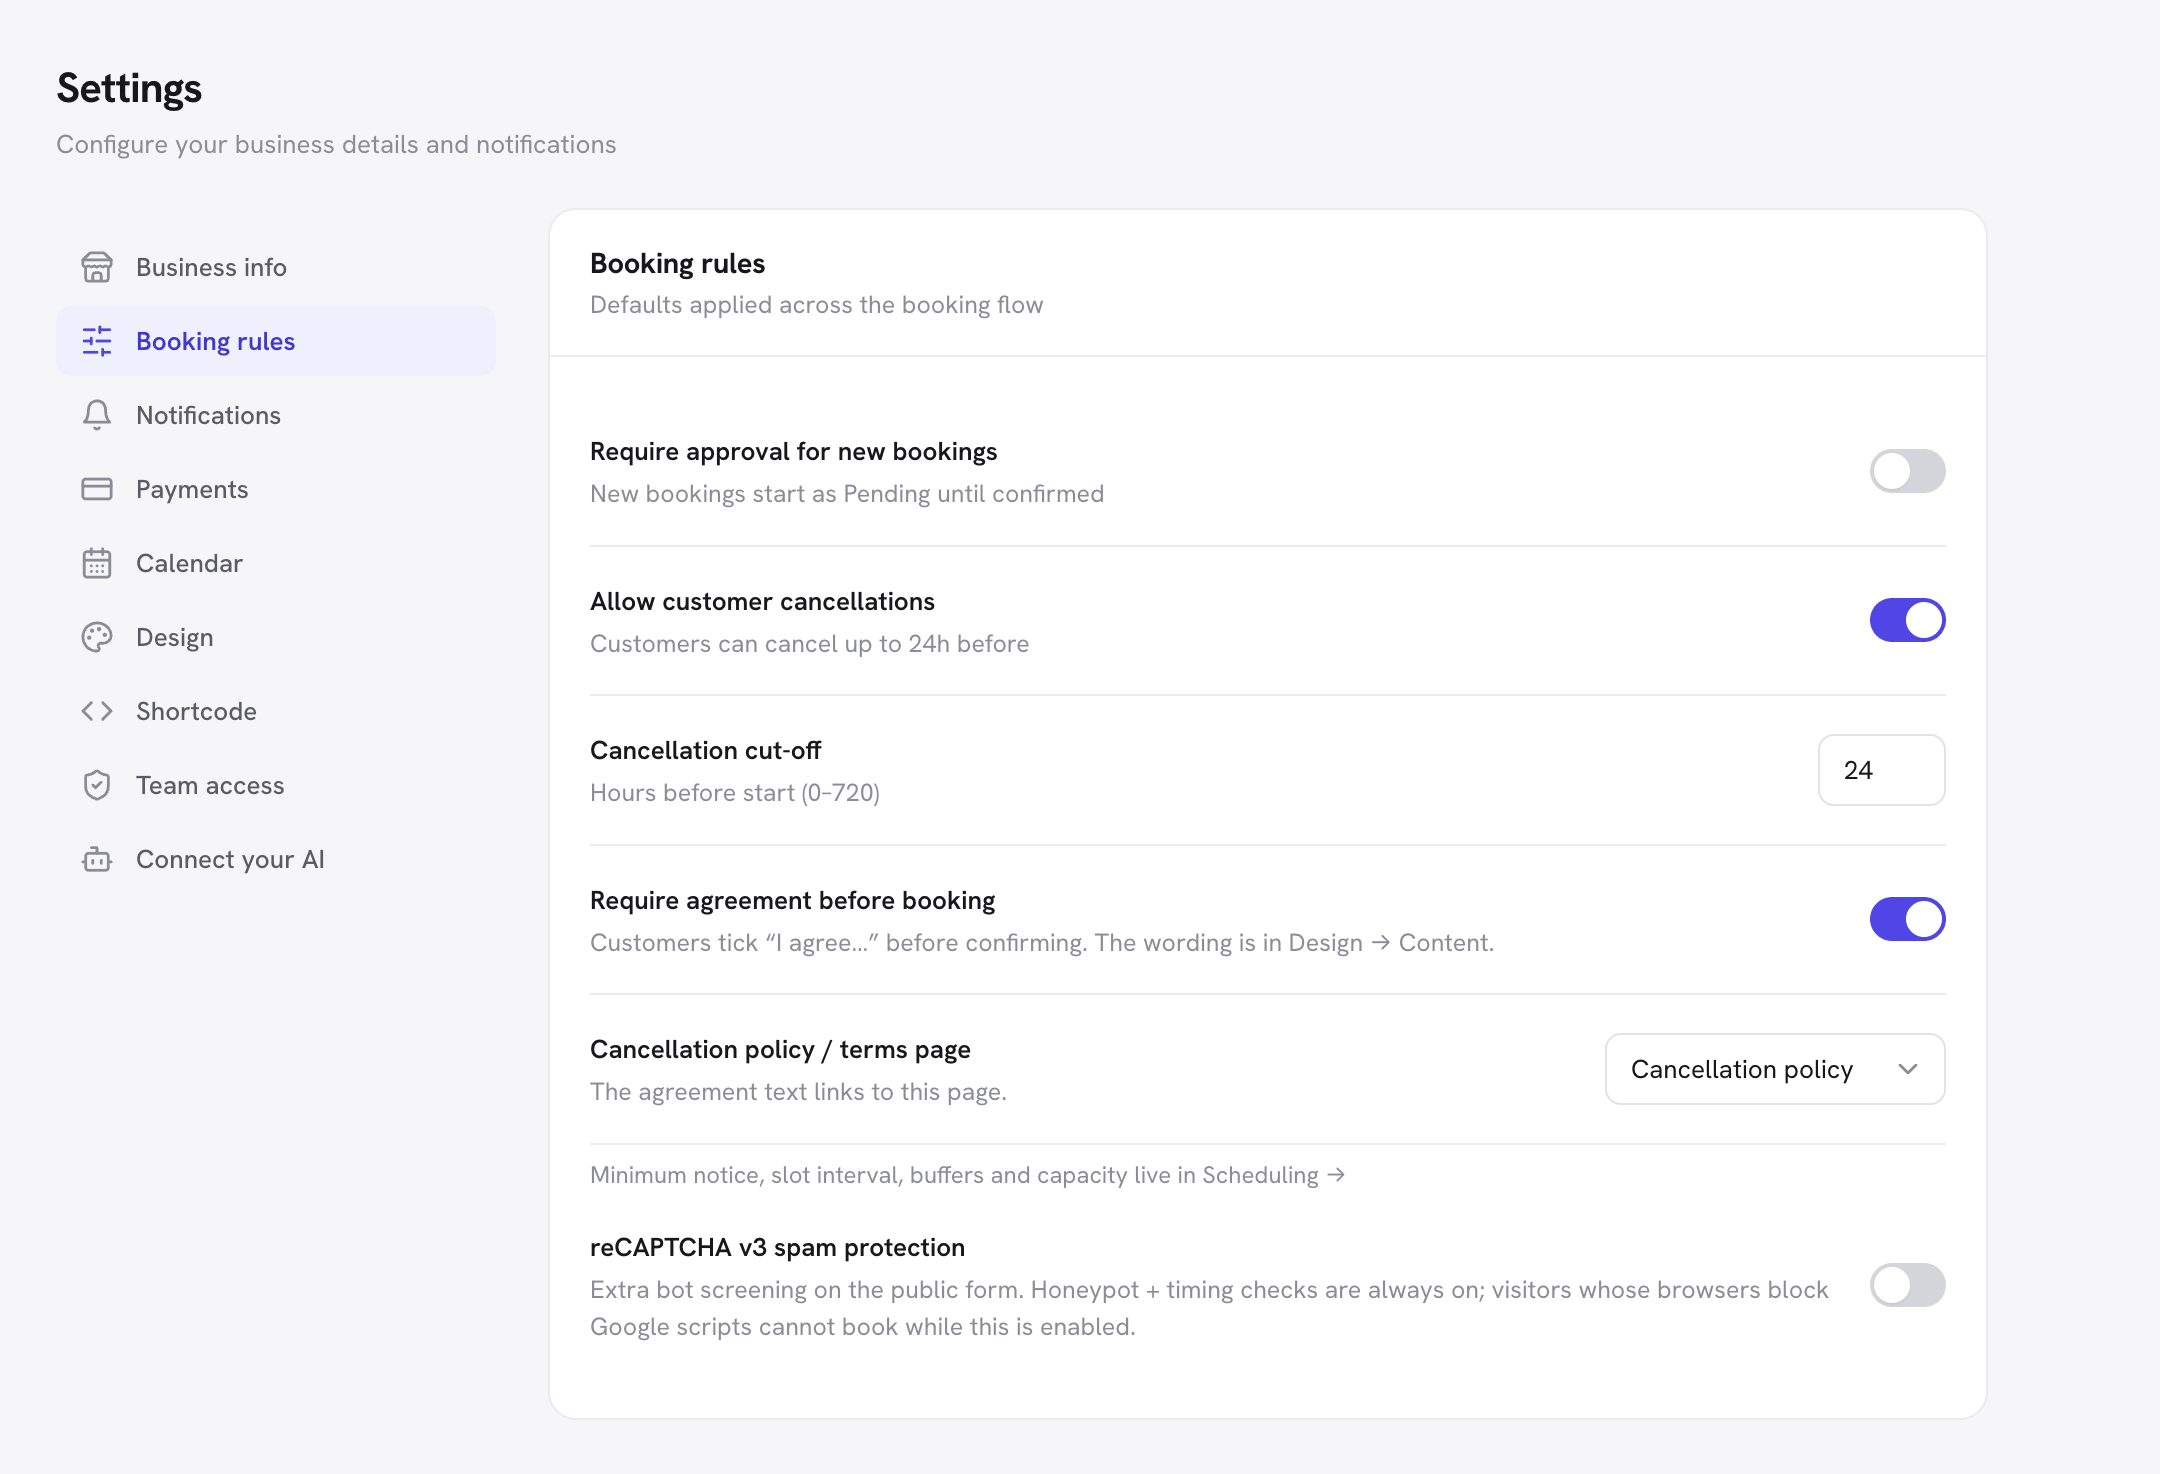
Approval. With Require approval for new bookings off, a booking confirms itself and the customer gets the confirmation email. Switch it on and each booking waits as Pending, holding the slot, while the customer gets a “request received” email until you confirm it.
Emails. Schedopia sends five: confirmed, pending, cancelled, a reminder, and a new-booking alert to your team, each switched on or off under Settings → Notifications. Since 1.4.2 you can rewrite each subject and opening line with tags like {customer_name} and {time}, and send the alert to the staff member who was booked. Reminders go out 24 hours ahead by default. Set the sender to an address on your own domain, and if confirmations go missing, add an SMTP plugin.
Cancellations. Confirmation and reminder emails carry a cancel link that works without an account. The Cancellation cut-off, 24 hours by default, is when it stops working. A cancelled booking frees its slot straight away.
Payments. Schedopia keeps a ledger, not a checkout. You record cash or a bank transfer with Record payment in the booking’s drawer, and by default, marking a priced booking completed records the full payment for you. Mark completed appears once the appointment’s start time has passed. If you invoice elsewhere, switch payment tracking off under Settings → Payments.
Terms. Under Booking rules, the form’s “I agree” line can link to your cancellation policy page, or be switched off.
Step 7: Put the booking form on a page
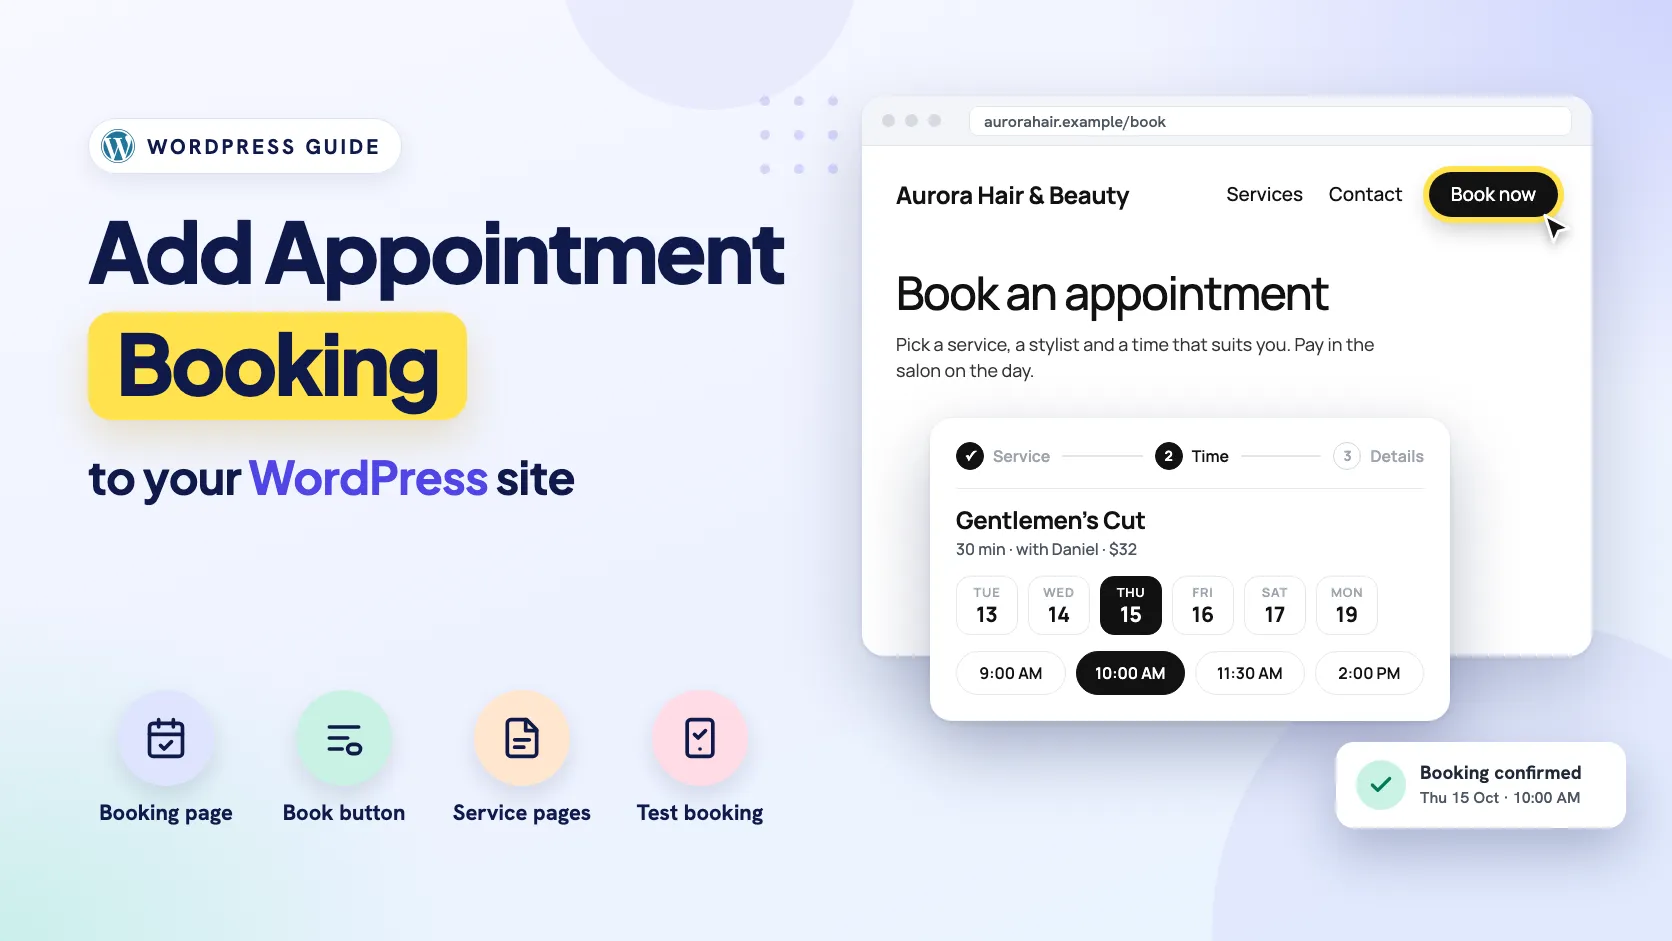
The front layer is one shortcode. Create a page, add [schedopia_booking] in a Shortcode block or Elementor’s Shortcode widget, and publish. The Getting started checklist on Schedopia’s dashboard has a Create page button that does this for you, publishing a “Book an appointment” page with the form on it.
Only one booking form works per page. Linking the page from your menu and service pages, matching the form to your theme and keeping it out of the page cache are covered step by step in How to add appointment booking to WordPress.
Step 8: Test the system, not just the form
A test booking proves the form works; a few deliberate mistakes prove the system does. Use your phone and a private browser window:
- Book a service more than a day ahead, with an email address you can check. The confirmation, or the “request received” email if you require approval, should arrive within minutes.
- Open Schedopia → Bookings, find it, and confirm it if it’s pending.
- Open the form in two browsers, pick the same time on both and press Book on each. The second should be refused as just taken.
- Look for a time inside your minimum notice. It shouldn’t be offered.
- Cancel the first booking from the link in its email, and check the time reappears on the form.
- Make one more booking, open it in Schedopia → Bookings and use Record payment to log a test cash payment. Its badge should change from Unpaid to Paid.
The booking in step 1 needs to be more than a day away because the cancel link stops working 24 hours before the start, by default. Mark completed only appears once an appointment has started, so check the automatic payment on completion after your first real appointment.
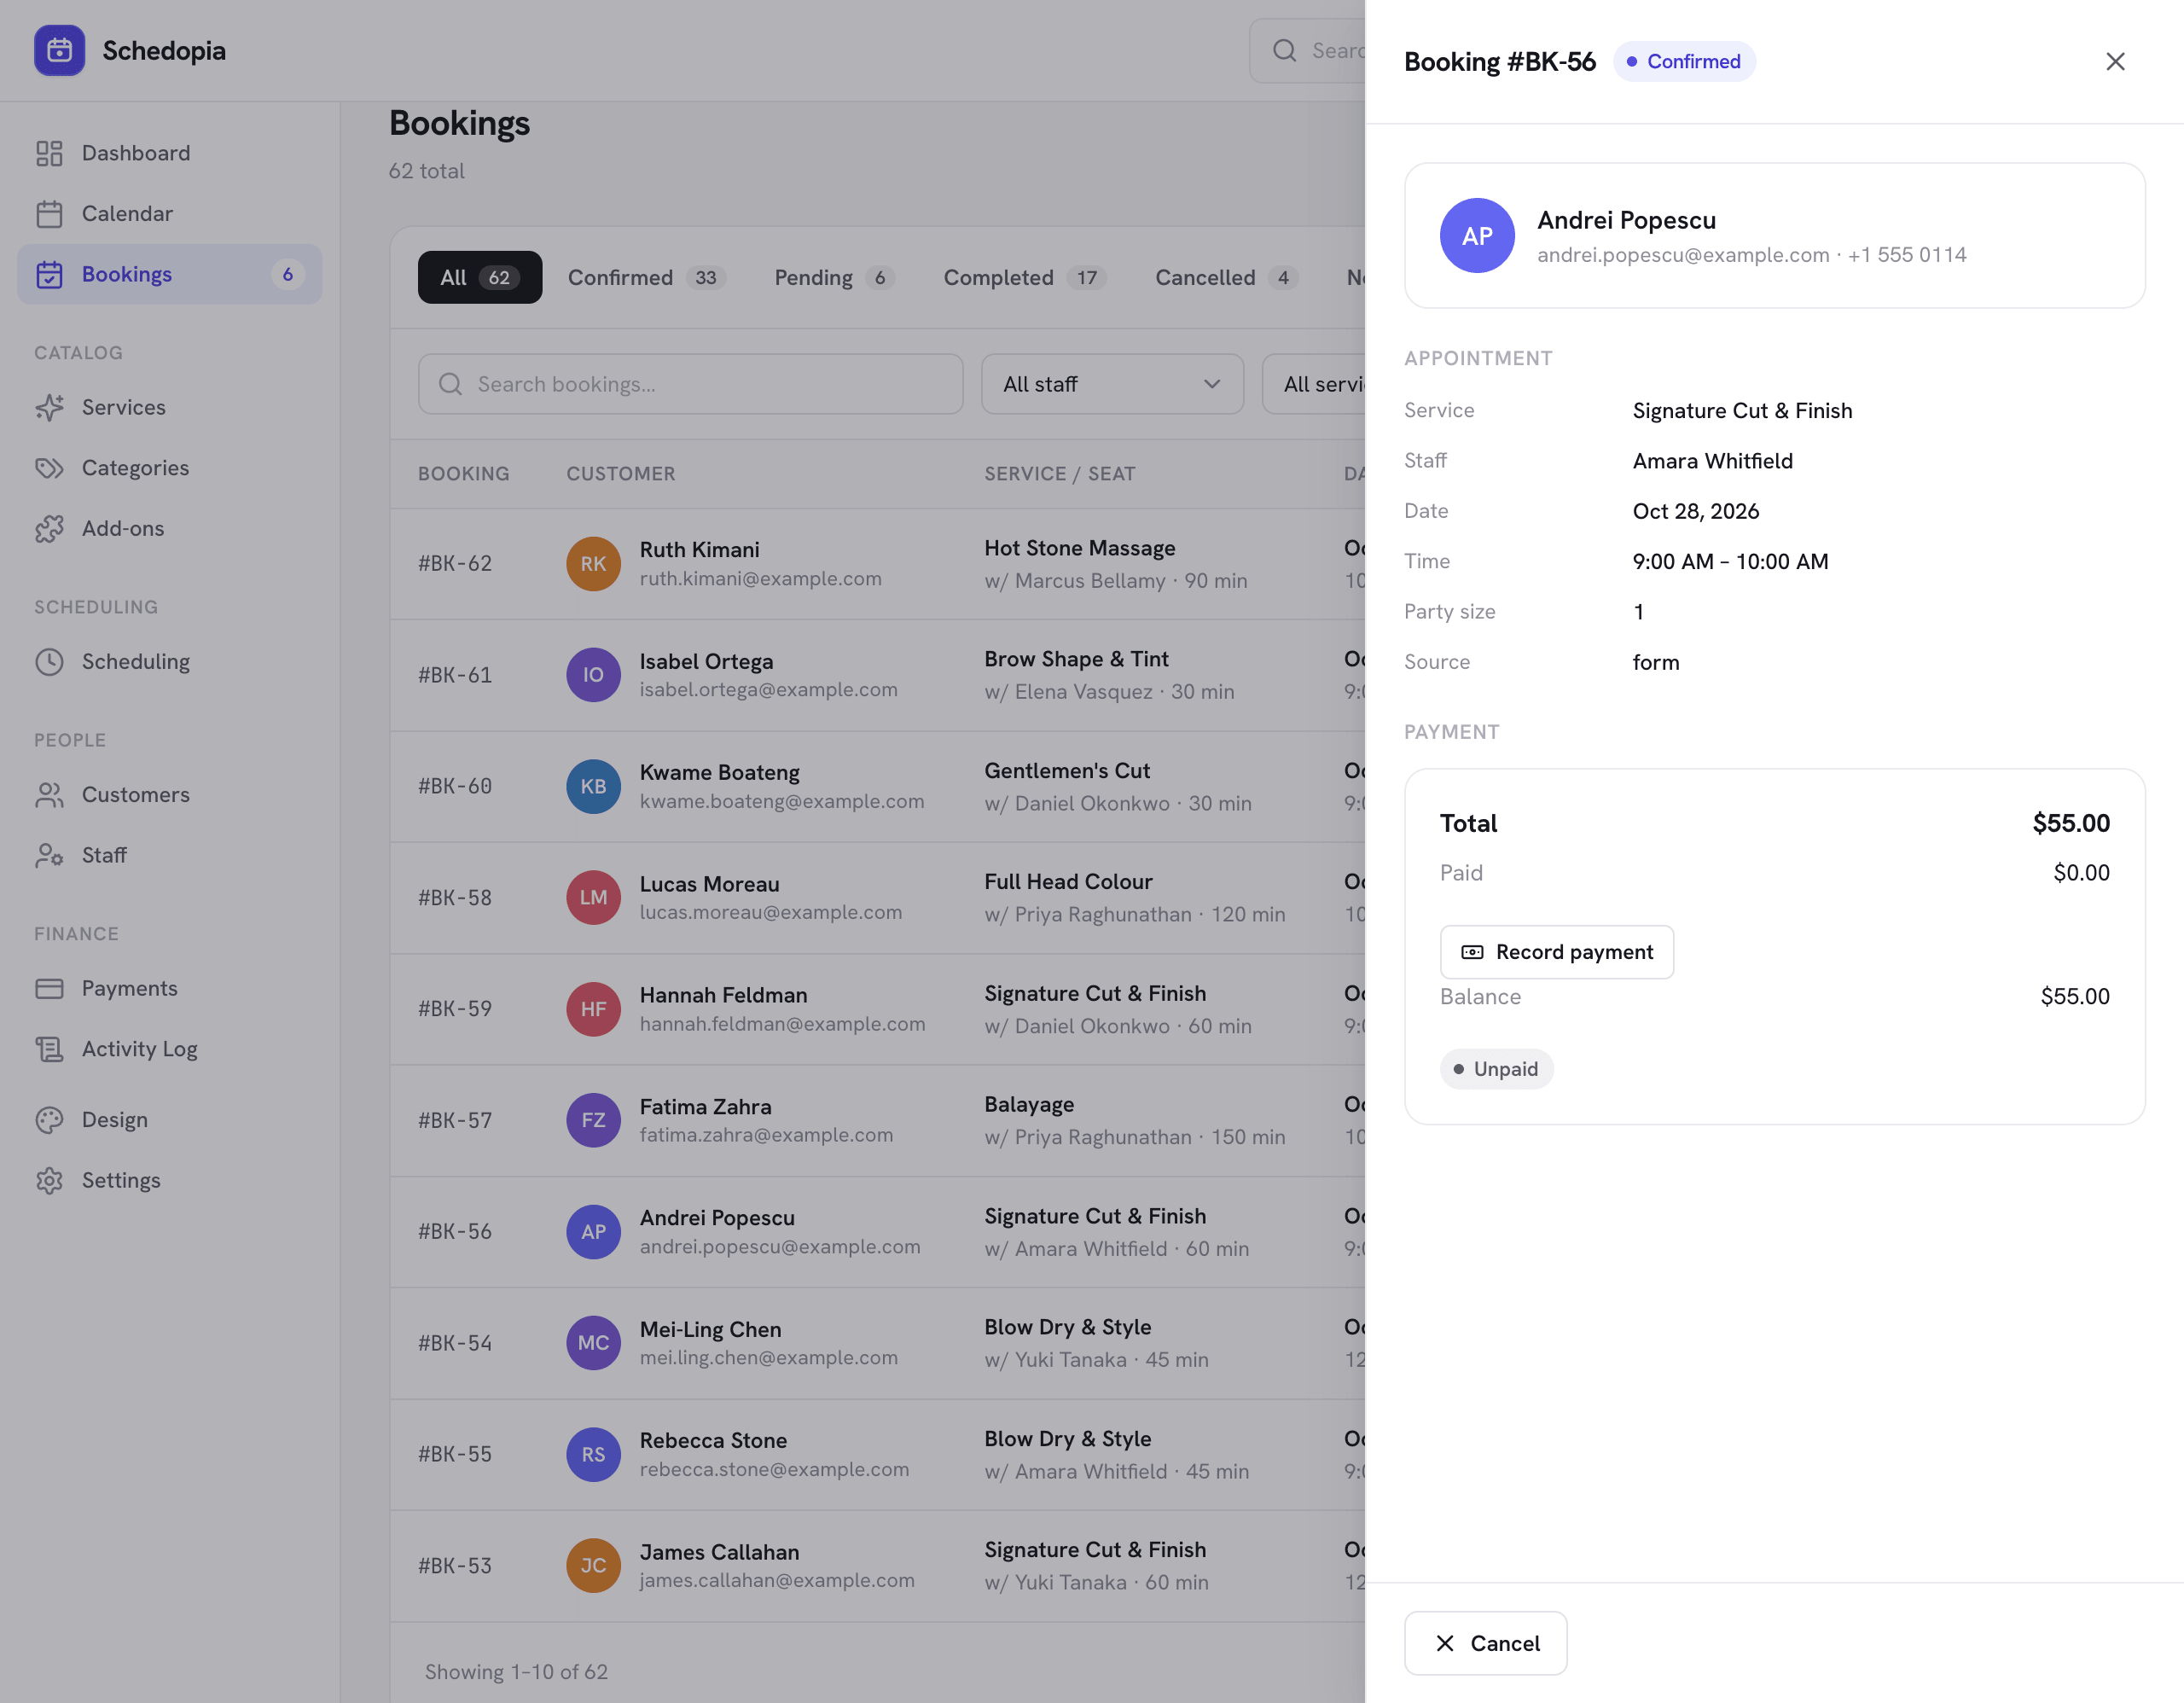
Day to day, the system runs from the same screens. Phone bookings go through New booking, which applies the same availability check as the form. The status tabs show what’s pending, and Export CSV downloads whatever you’ve filtered.
What Schedopia won’t do yet
Schedopia handles the four layers above, but some things a booking system might be expected to do aren’t there yet, as of version 1.4.2:
- No online card payment or deposits. Customers pay on the day or by transfer, and you record it. Online payments are planned for Schedopia Pro, which isn’t on sale.
- The form looks two weeks ahead. Customers can book today and the next 14 days, with no setting to open the calendar further or close it sooner. Appointments further out go in from the admin.
- Customers choose their staff member. There’s no “anyone available” option on the public form. New booking in the admin has First available.
- No recurring bookings, SMS or customer accounts. Each appointment is booked separately, messages go by email, and customers cancel from a link rather than a login.
- Cancelling, not rescheduling. Customers can cancel themselves; moving an appointment is done by you.
- No two-way calendar sync. A private calendar feed shows bookings in Google or Outlook, but time blocked there doesn’t remove slots here.
If you need a deposit at the moment of booking, or customers who book months ahead, a different tool will suit you better today.
Where to start
Write the rules sheet from Step 1 today: every service with its real length, who performs it and when they work. It’s the part no plugin can do for you. Then take your first booking in ten minutes with one service and one person, and add the rest of the sheet once that first booking has gone through.
Frequently Asked Questions
Can I create a booking system in WordPress without coding?
Yes. A booking plugin such as Schedopia adds services, staff schedules, booking rules and a booking form to WordPress through its admin screens. You enter your rules, place one shortcode on a page and the system works out every bookable time itself.
Do I need a plugin to take bookings on a WordPress site?
Not strictly, but a contact form only collects requests, so someone still has to check the calendar and reply to each one. A booking plugin shows customers only the times that are free and stops two people taking the same slot.
How long does it take to set up a WordPress booking system?
An afternoon for most small businesses. Entering one service and one staff member in Schedopia takes about ten minutes; writing down every service, who performs it and when they work is what takes the rest of the time.
Is Schedopia free?
Yes. Schedopia is free on WordPress.org and runs on your own site, with no per-booking fees. Bookings and customer records stay in your WordPress database.
What stops two customers booking the same time?
Schedopia re-checks availability at the moment each booking is saved, inside a database transaction. If two customers press Book on the last free slot together, the first is saved and the second is told the time was just taken.
How far ahead can customers book with Schedopia?
About two weeks. As of version 1.4.2, Schedopia's booking form offers today and the next 14 days, with no setting to change that. You can enter later appointments yourself from the admin.
Can customers pay online when they book?
Not with Schedopia yet. Schedopia records cash, bank transfer and other offline payments against each booking. Online card payments are planned for Schedopia Pro, which is not on sale yet.
Can staff members see their own bookings?
Yes, since Schedopia 1.4.2. You can link a staff member to a WordPress login or invite them by email, and a Staff login sees only that person's own bookings, calendar and customers.