How to create a seat reservation system in WordPress
Create a seat reservation system in WordPress with Schedopia, a free WordPress seat reservation plugin. Draw the seating chart, price tiers and sell seats.
A paper seating chart works fine until two people phone about the same seat. A spreadsheet lasts a little longer. A hosted ticketing service fixes the double-selling, then takes a slice of every ticket and keeps your customer list on its own servers.
If your venue’s website already runs on WordPress, there’s a simpler route. Let the site hold the seat map, take the reservations and refuse to sell a seat twice. This guide shows how to build that with Schedopia, a free WordPress seat reservation plugin, going from a fresh install to a confirmed test booking.
It’s written for places where people sit in a particular spot at a dated session: yoga and fitness studios, workshops and classes, community halls, small theatres. If you’re selling bus seats or restaurant tables, a tool built for transport or tables will suit you better.
What a seat reservation system has to do
Strip away the feature lists and a seat reservation system has four jobs:
- Show customers a map of the room, with taken seats clearly taken.
- Charge the right price for each seat.
- Never sell the same seat twice, even when two people click at the same moment.
- Confirm the booking so the customer knows it’s real.
The third one is what separates a real system from a nice picture of one. Keep it in mind when you compare plugins.
Choosing a WordPress seat booking plugin
Search the plugin directory and most of what comes back falls into two groups. There are general event and ticketing plugins, where a seat map is an extra bolted onto something else. And there are small single-purpose seat plugins, many of them built for buses or cinemas.
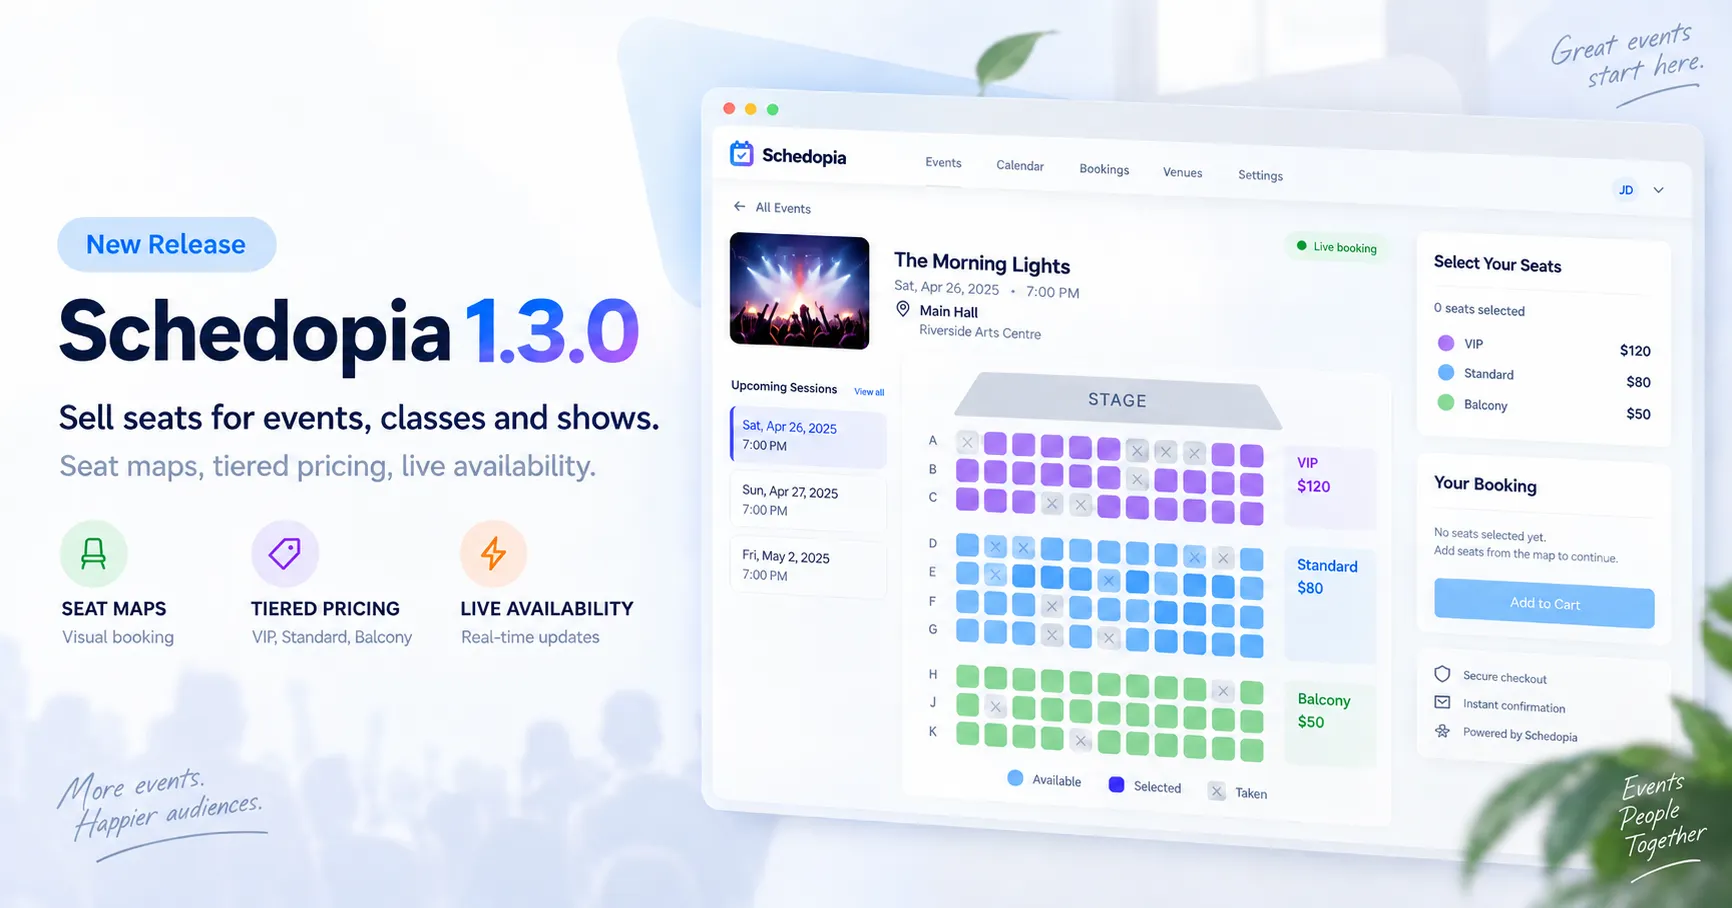
Schedopia sits between the two. Seat-mapped events arrived in Schedopia 1.3.0 as part of the free plugin. The same plugin also takes appointments, so a studio that sells class places and one-to-one sessions runs both from one admin and one customer list. Bookings are stored in your own WordPress database (here’s why that matters), and we charge no per-booking fees or seat commissions.
That’s the pitch. Here’s how it works.
Step 1: install Schedopia and switch on events
Install Schedopia from Plugins → Add New and activate it. The setup wizard asks what you take bookings for. Choose Events & seats if seats are all you sell. If you also take appointments, you can run both.
Already using Schedopia for appointments? Go to Settings → Business info and change What you take bookings for to an option that includes events. The event screens show up in the admin once you do.
Step 2: create a venue and a hall
Schedopia describes your space in two layers. A venue is the building: the studio, the community centre, the theatre. A hall is a room inside it where people sit, and each hall gets its own seat map.
Open Venues & Seats and add your venue, then add a hall to it. Most small venues need one of each. A community centre with a main hall and a meeting room would have two halls under one venue, and you can add more venues later if you run events in more than one building.
Step 3: draw your seating chart
This is the step that replaces the paper chart. In the hall’s seat planner, set the number of rows and the seats per row, and the planner generates the grid. Then shape it to match the room:
- Add aisles where the room has gaps.
- Pick a numbering style. Seats get theatre-style labels like A1 and A2, numbered left to right or right to left, from any starting number, with an optional prefix such as VIP-A1.
- Change the numbering on a single row if that row is different from the rest.
- Disable any seat you shouldn’t sell, like a broken chair or the one behind a pillar.
The map you draw is the map customers see, so copy the real room as closely as you can.
One piece of advice we’d give anyone: finish the map before you sell a single seat. Once a hall has bookings, Schedopia won’t let you change its seat counts, and a row with bookings keeps its first seat number. That’s on purpose, because it stops a sold seat from quietly becoming a different seat. It does mean your first layout should be the right one.
Step 4: set seat tiers and prices
Seat categories are your price tiers. Give each one a name, a colour and a price. VIP, Standard, Balcony, Front row: call them whatever your venue already calls them. Categories can be shared across all your halls, so you only set the prices up once.
Seats in a category take the category price. If one seat deserves its own price (the one with the extra legroom, say), set a price on that seat alone.
Changing a price only affects future bookings. People who have already booked keep the price they paid.
Step 5: create an event
Choose the venue and hall, then Add event. An event needs a name, a start time, an end time and at least one hall. Add a description, which customers read on the event card. You can also add a cover image. Go landscape, because the card crops it to a wide banner.
You won’t find a price or capacity field on the event. Both come from the seats. The events list works them out for you: seats left, a “from” price taken from the cheapest bookable seat, and Fully booked once everything has gone.
If an event outgrows its room, tick a second hall in the same venue. Customers get a tab for each hall on the seat map and can pick seats from any of them in one booking.
Event times use your business timezone, the one you set in the setup wizard.
Step 6: put the seat booking form on a page
Create a page and add the Schedopia shortcode with the Shortcode block, or Elementor’s Shortcode widget if you build pages in Elementor.
If you only sell seats:
[schedopia_booking]If you run appointments and events on the same site, give events a page of their own:
[schedopia_booking mode="event"]Before you publish, open Design → Booking form and set your colours, so the form looks like part of your site and not a widget from somewhere else.
Step 7: book a seat as a customer
Open the page in a private window so you see it the way a visitor does. Booking takes three steps:
- Upcoming events appear as cards with the date, venue and hall, duration, seats left and starting price.
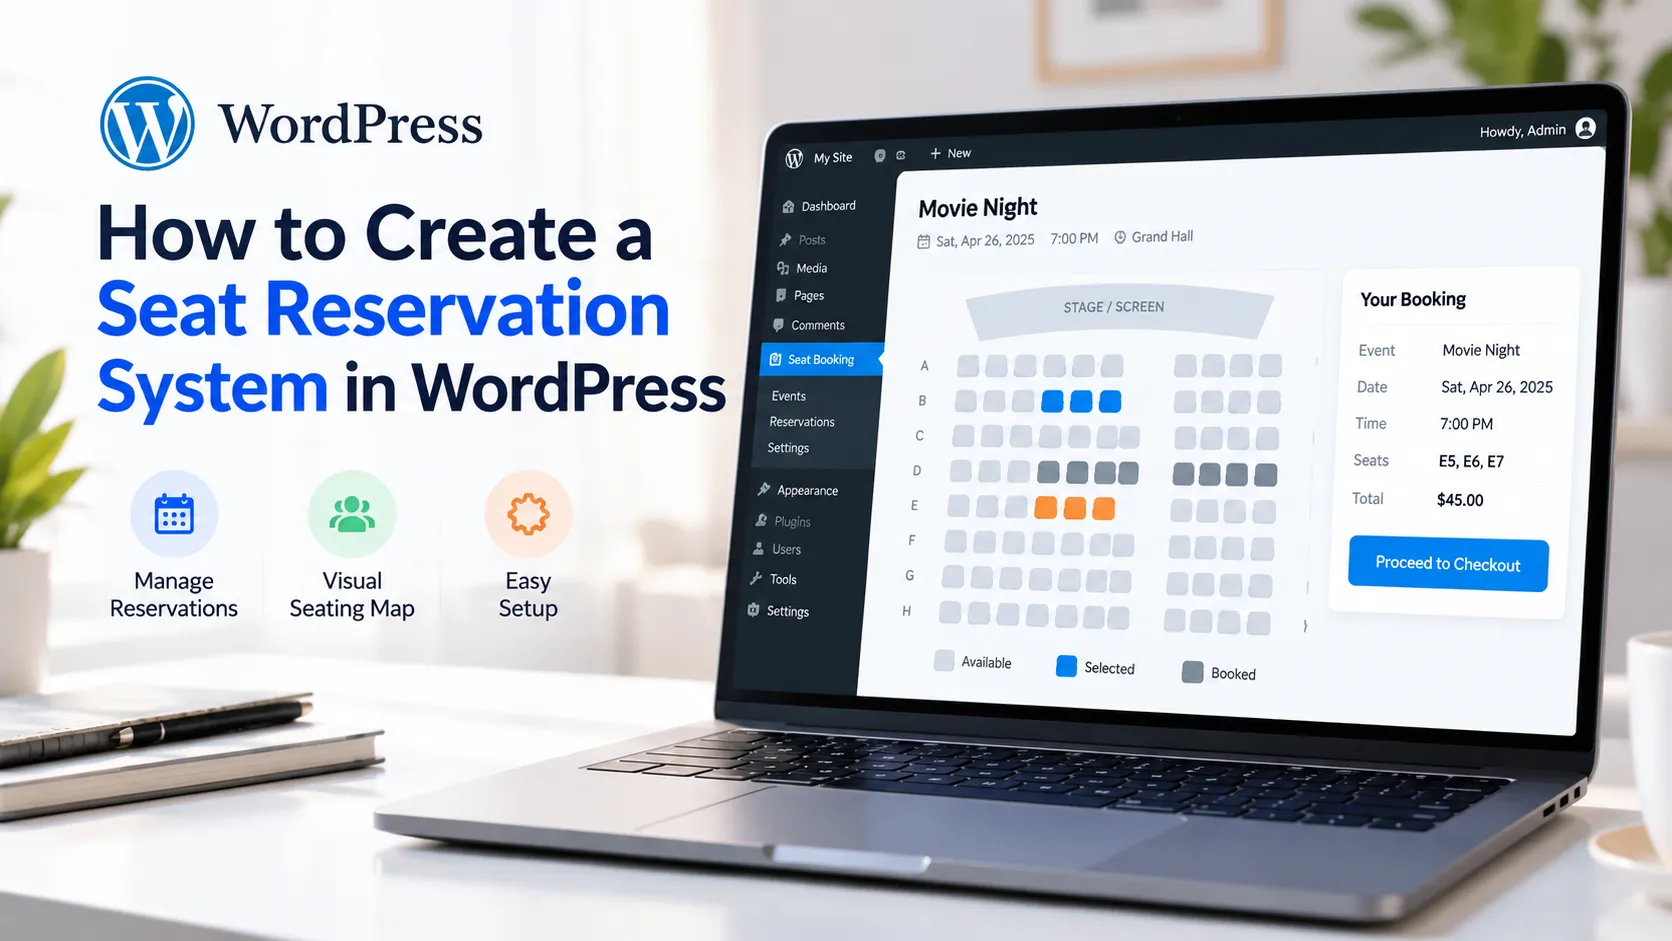
- Choosing an event opens the seat map. Tiers are colour-coded, taken seats are greyed out and a running total adds up as you click. One booking can hold up to eight seats.
- The customer enters their name and contact details and confirms.
Now check the inbox. The confirmation lists the seats, the date and time and the total, with buttons to add it to Google, Outlook or Apple Calendar. It also has a cancellation link, and cancelling puts those seats straight back on sale.
What happens when two people want the same seat
Say it’s Saturday’s show and there’s one seat left in the front row. Two people click it in the same second.
Schedopia checks every reservation inside a database transaction, not just on the screen. Exactly one of those two people gets the seat. The other is told it’s no longer available and can choose another.
That’s job three from the list at the top, and it’s why we’d always pick a proper seat reservation plugin over a form plugin with a seat dropdown.
Running it day to day
Phone bookings use the same map. In the admin, start a new booking, choose the event, tap the seats, pick the customer and save. Those seats then show as taken on the public map like any other booking.
Payments are offline for now. Customers pay in cash or by bank transfer, and you record the payment against the booking so it shows as paid. Online payment at checkout, deposits and partial payments are planned for Schedopia Pro.
If an event moves, edit its time. Every active booking moves with it and the reminder emails are rescheduled, so nobody turns up on the old date.
If you have to call an event off, cancel its bookings first. Each customer gets a cancellation email, and then you can delete the event. Schedopia won’t delete an event that still has reservations on it.
Put your first event on sale
That’s the whole build: a venue, a hall, a seating chart, some tiers, an event and a page. For a single room, most of the time goes on getting the map right.
Schedopia is free on WordPress.org. Install it, draw your room and put a test event on sale. The venues and seats docs cover every option in the planner, and if you also take appointments, this ten-minute guide covers that side. If your venue does something unusual, tell us about it.
Frequently Asked Questions
Is Schedopia a free WordPress seat reservation plugin?
Yes. Venues, seat maps, price tiers, events and the seat booking form are all in the free plugin on WordPress.org, and there are no per-booking fees or seat commissions.
Can customers choose their own seats?
Yes. Customers pick seats on a map of your hall. Tiers are colour-coded, taken seats are greyed out, and one booking can hold up to eight seats.
How does Schedopia stop the same seat being sold twice?
Each reservation is checked against seats already taken inside a database transaction. If two customers try to book the same seat at once, exactly one gets it and the other is told it is no longer available.
Can I charge different prices for different seats?
Yes. Group seats into tiers such as VIP and Standard, each with its own colour and price, and override the price on any single seat.
Can I run seat reservations and appointments on the same site?
Yes. Set What you take bookings for to include both in Settings, put the appointment form on one page and [schedopia_booking mode="event"] on another.
Can customers pay online when they reserve a seat?
Not yet. Payments are recorded offline, for example cash or bank transfer. Online payment at checkout, deposits and partial payments are planned for Schedopia Pro.